![]()
SecuritySpy Mobile Apps
User Guide
Written by Ben Bird - Ben Software Ltd
Download: iOS or tvOS | Android
The SecuritySpy Mobile apps allow you to easily monitor your SecuritySpy CCTV system from wherever you are, from your iPhone, iPad, Apple TV, or Android device. With easy setup and an intuitive user interface, these apps provide the ideal viewing experience for your cameras.
Table of Contents
- Getting Started
- Overscan Calibration
- Live Grid View
- Live Full-Screen View
- Schedule Setter
- Notifications
- Multiplex
- Captures
- Settings
- Connecting Over a VPN
- Getting Help
- Appendix: URL Scheme
Getting Started
To use this app, you must have our SecuritySpy software running your Mac, with its web interface enabled. Additionally, if you want to be able to connect over the internet, set up remote access.
Initially, the app will show the Servers panel - this is where you can add a new server to the app, or connect to an already-added server:
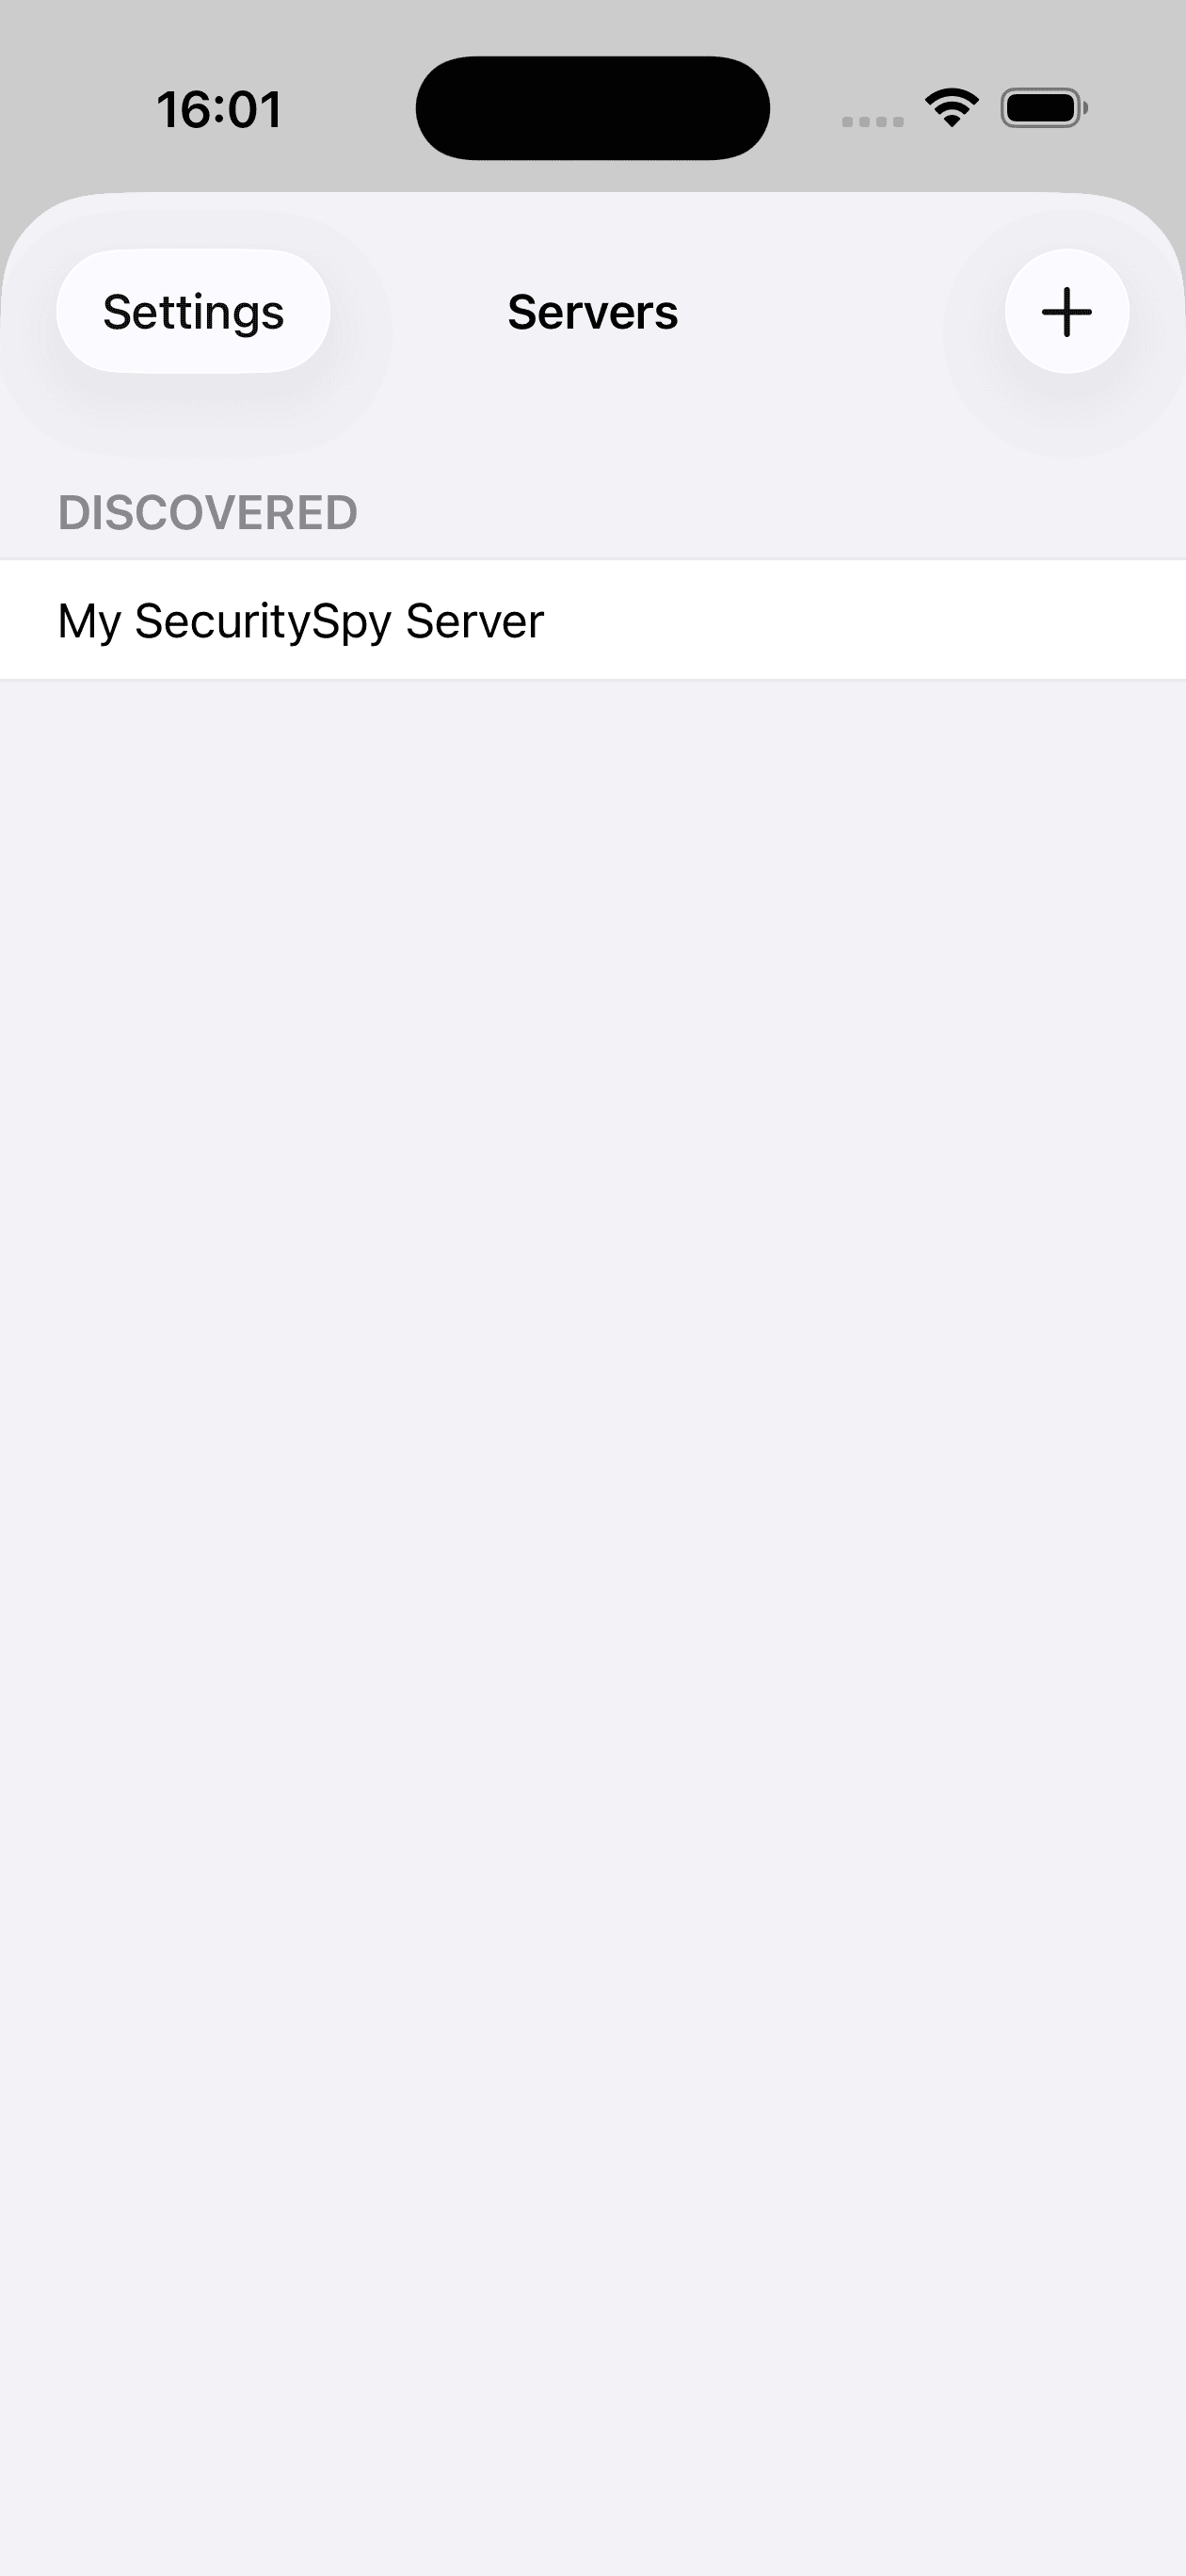
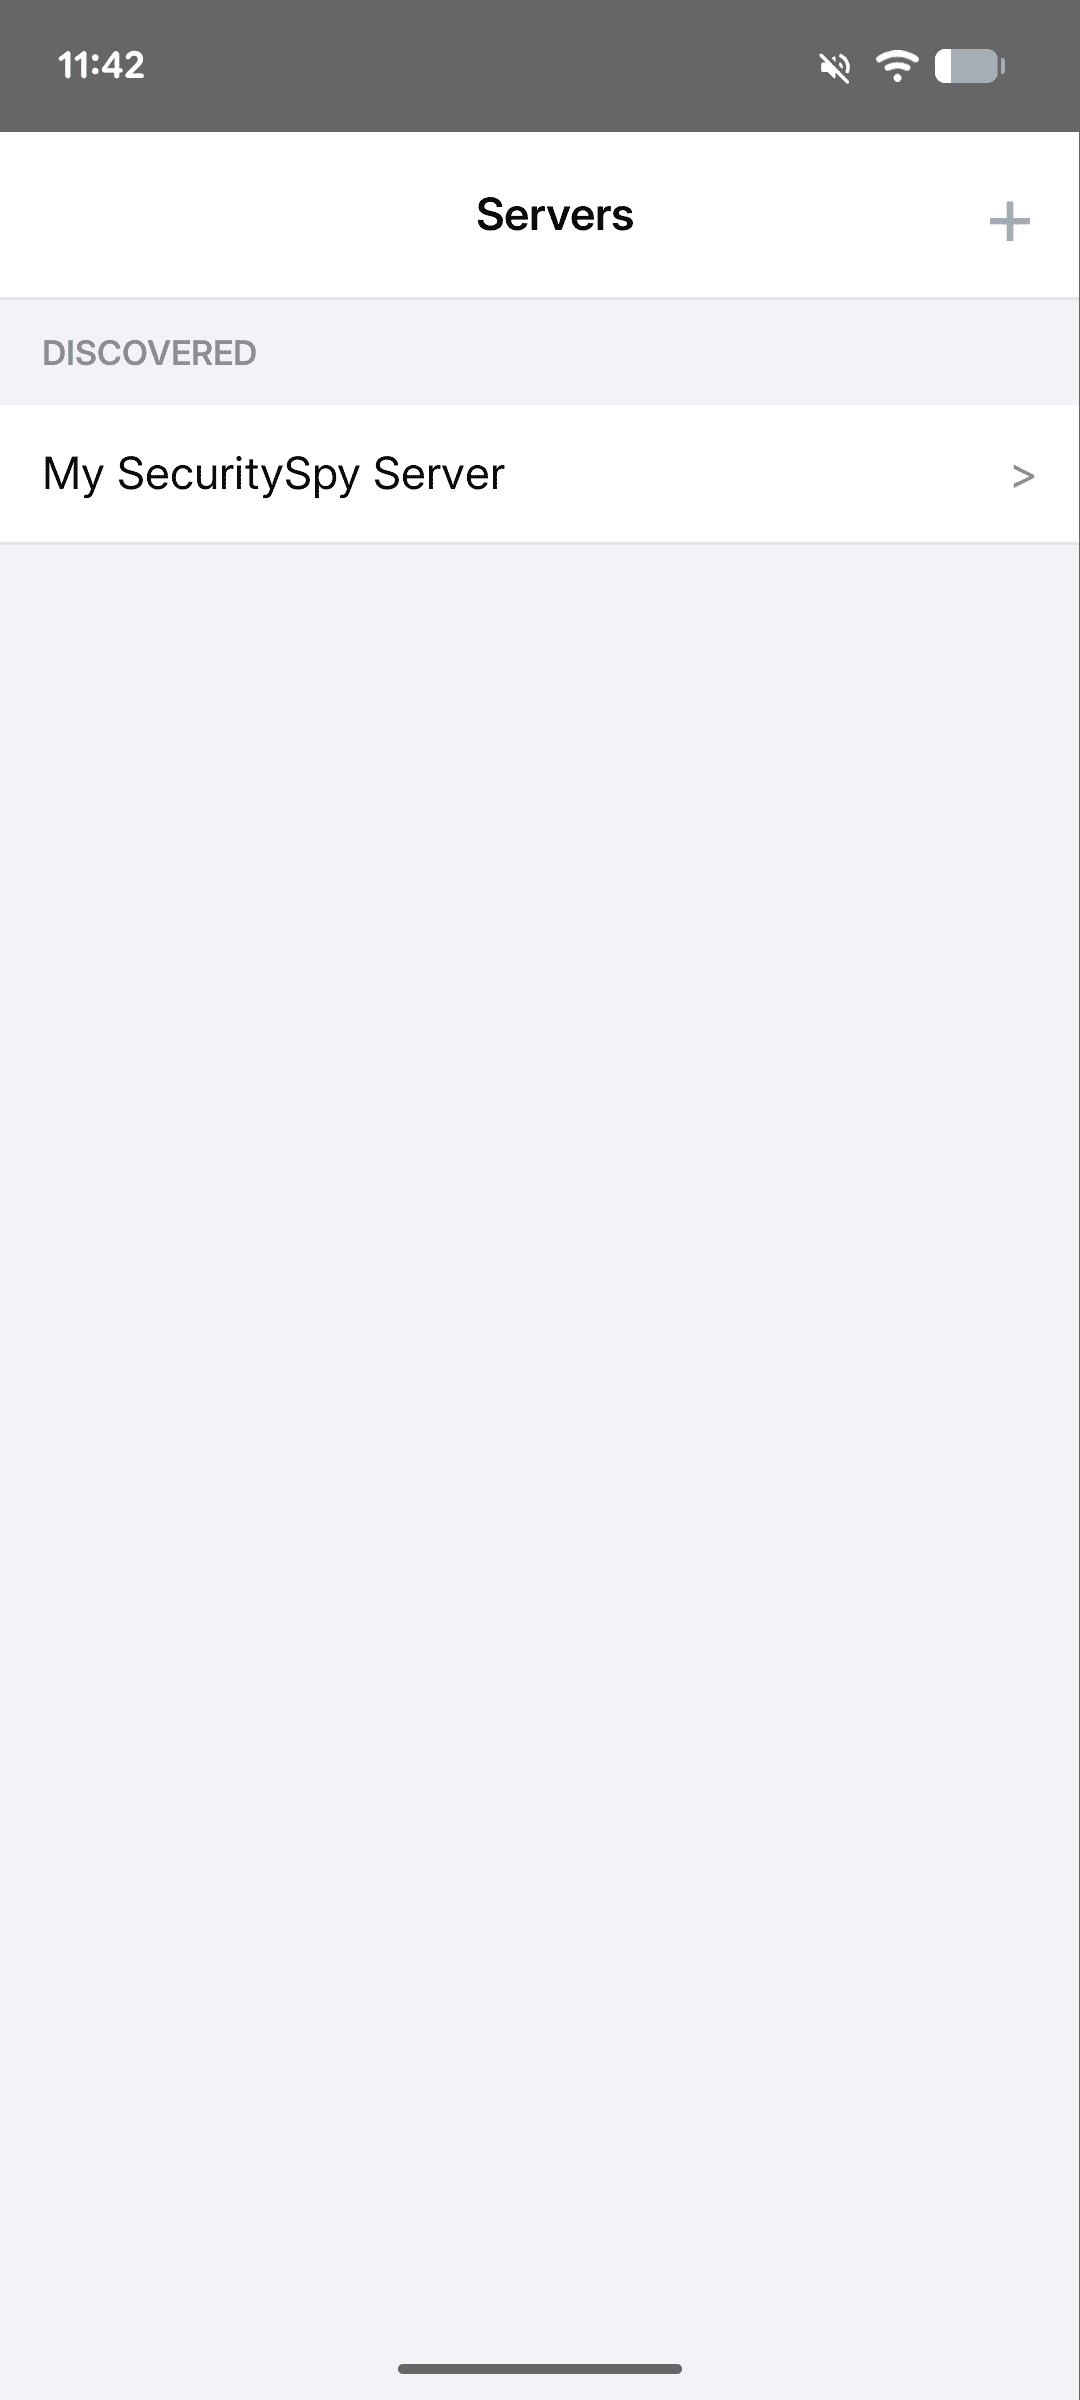
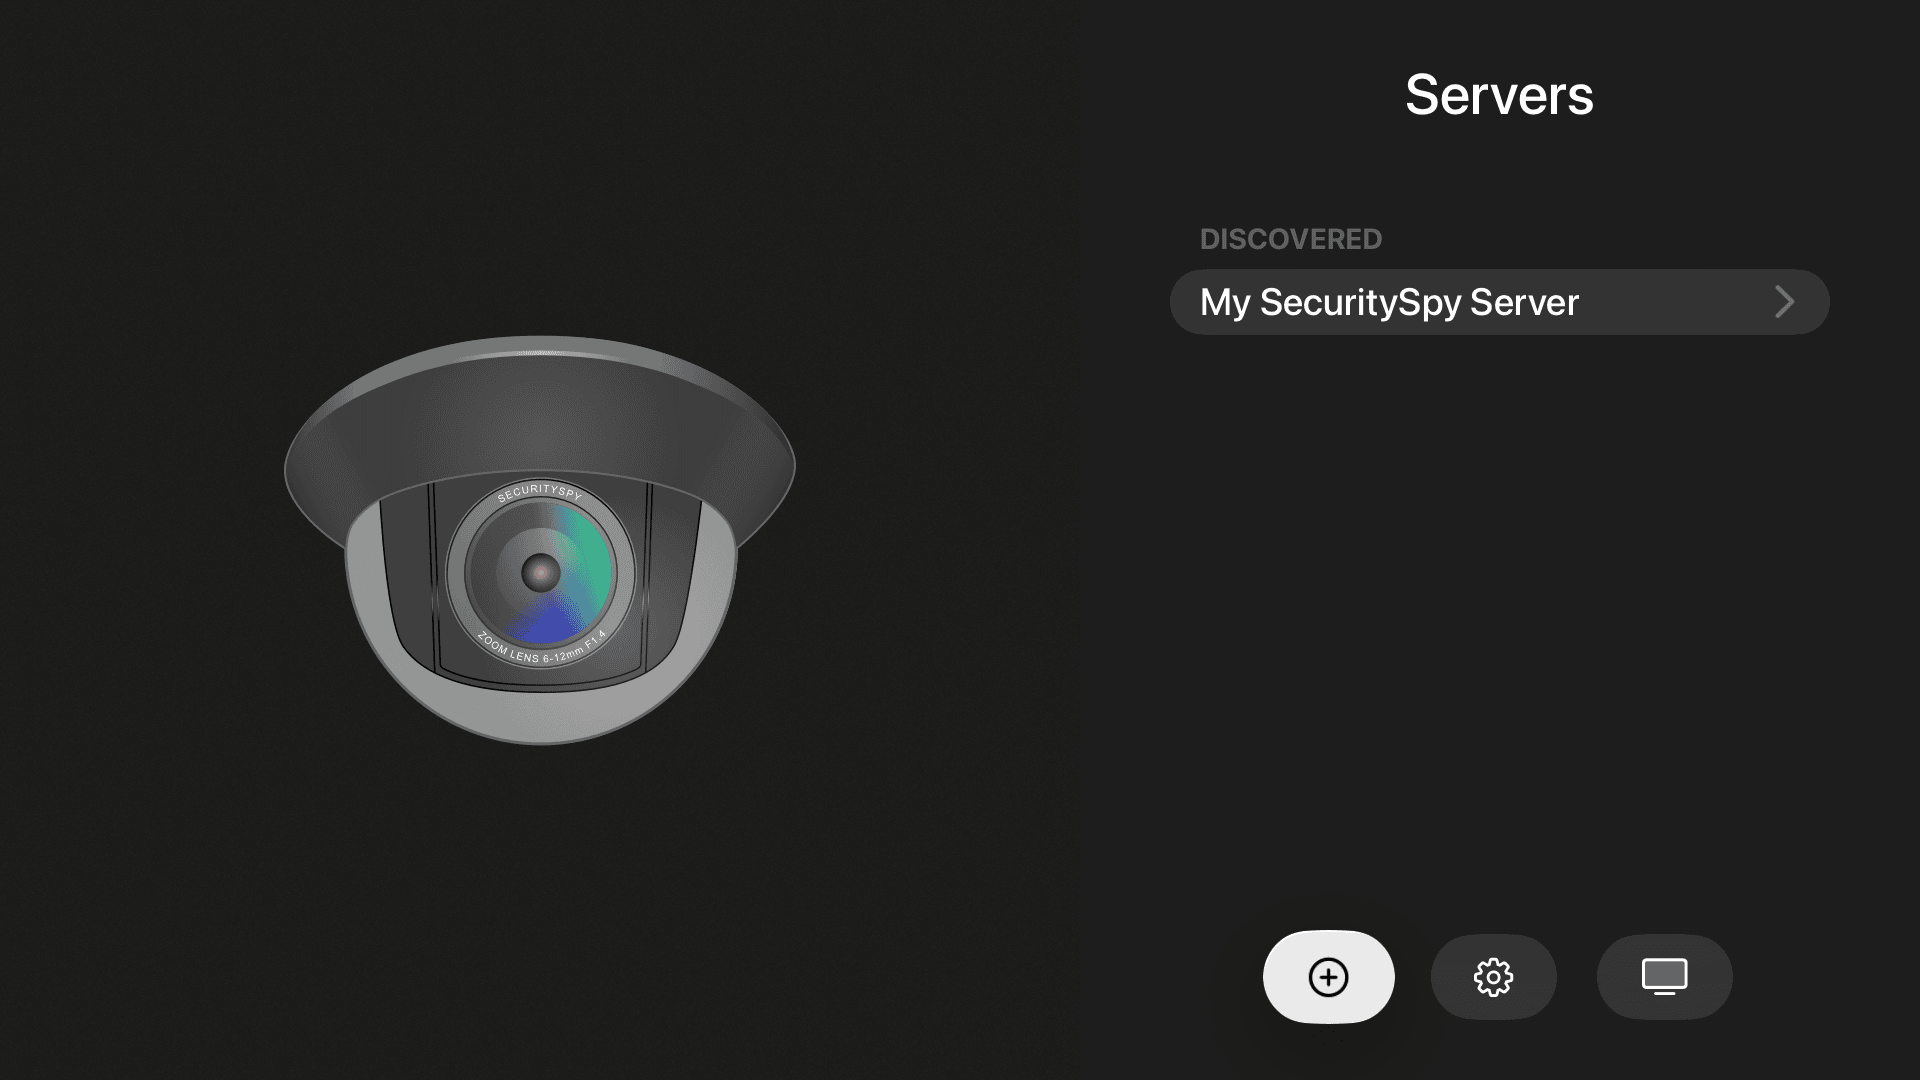
The app will automatically discover any SecuritySpy server on your local network that has its web interface enabled.
Tap on any discovered server to add it. The app uses Bonjour to connect to local servers (which avoids the need to use IP addresses), and if you have set up remote monitoring using SecuritySpy's DDNS system, it will obtain these details too, allowing it to connect to your SecuritySpy server from the internet without any additional setup.
To add a server that cannot be automatically discovered (e.g. it is not on your local network), tap the plus button to enter the server details:
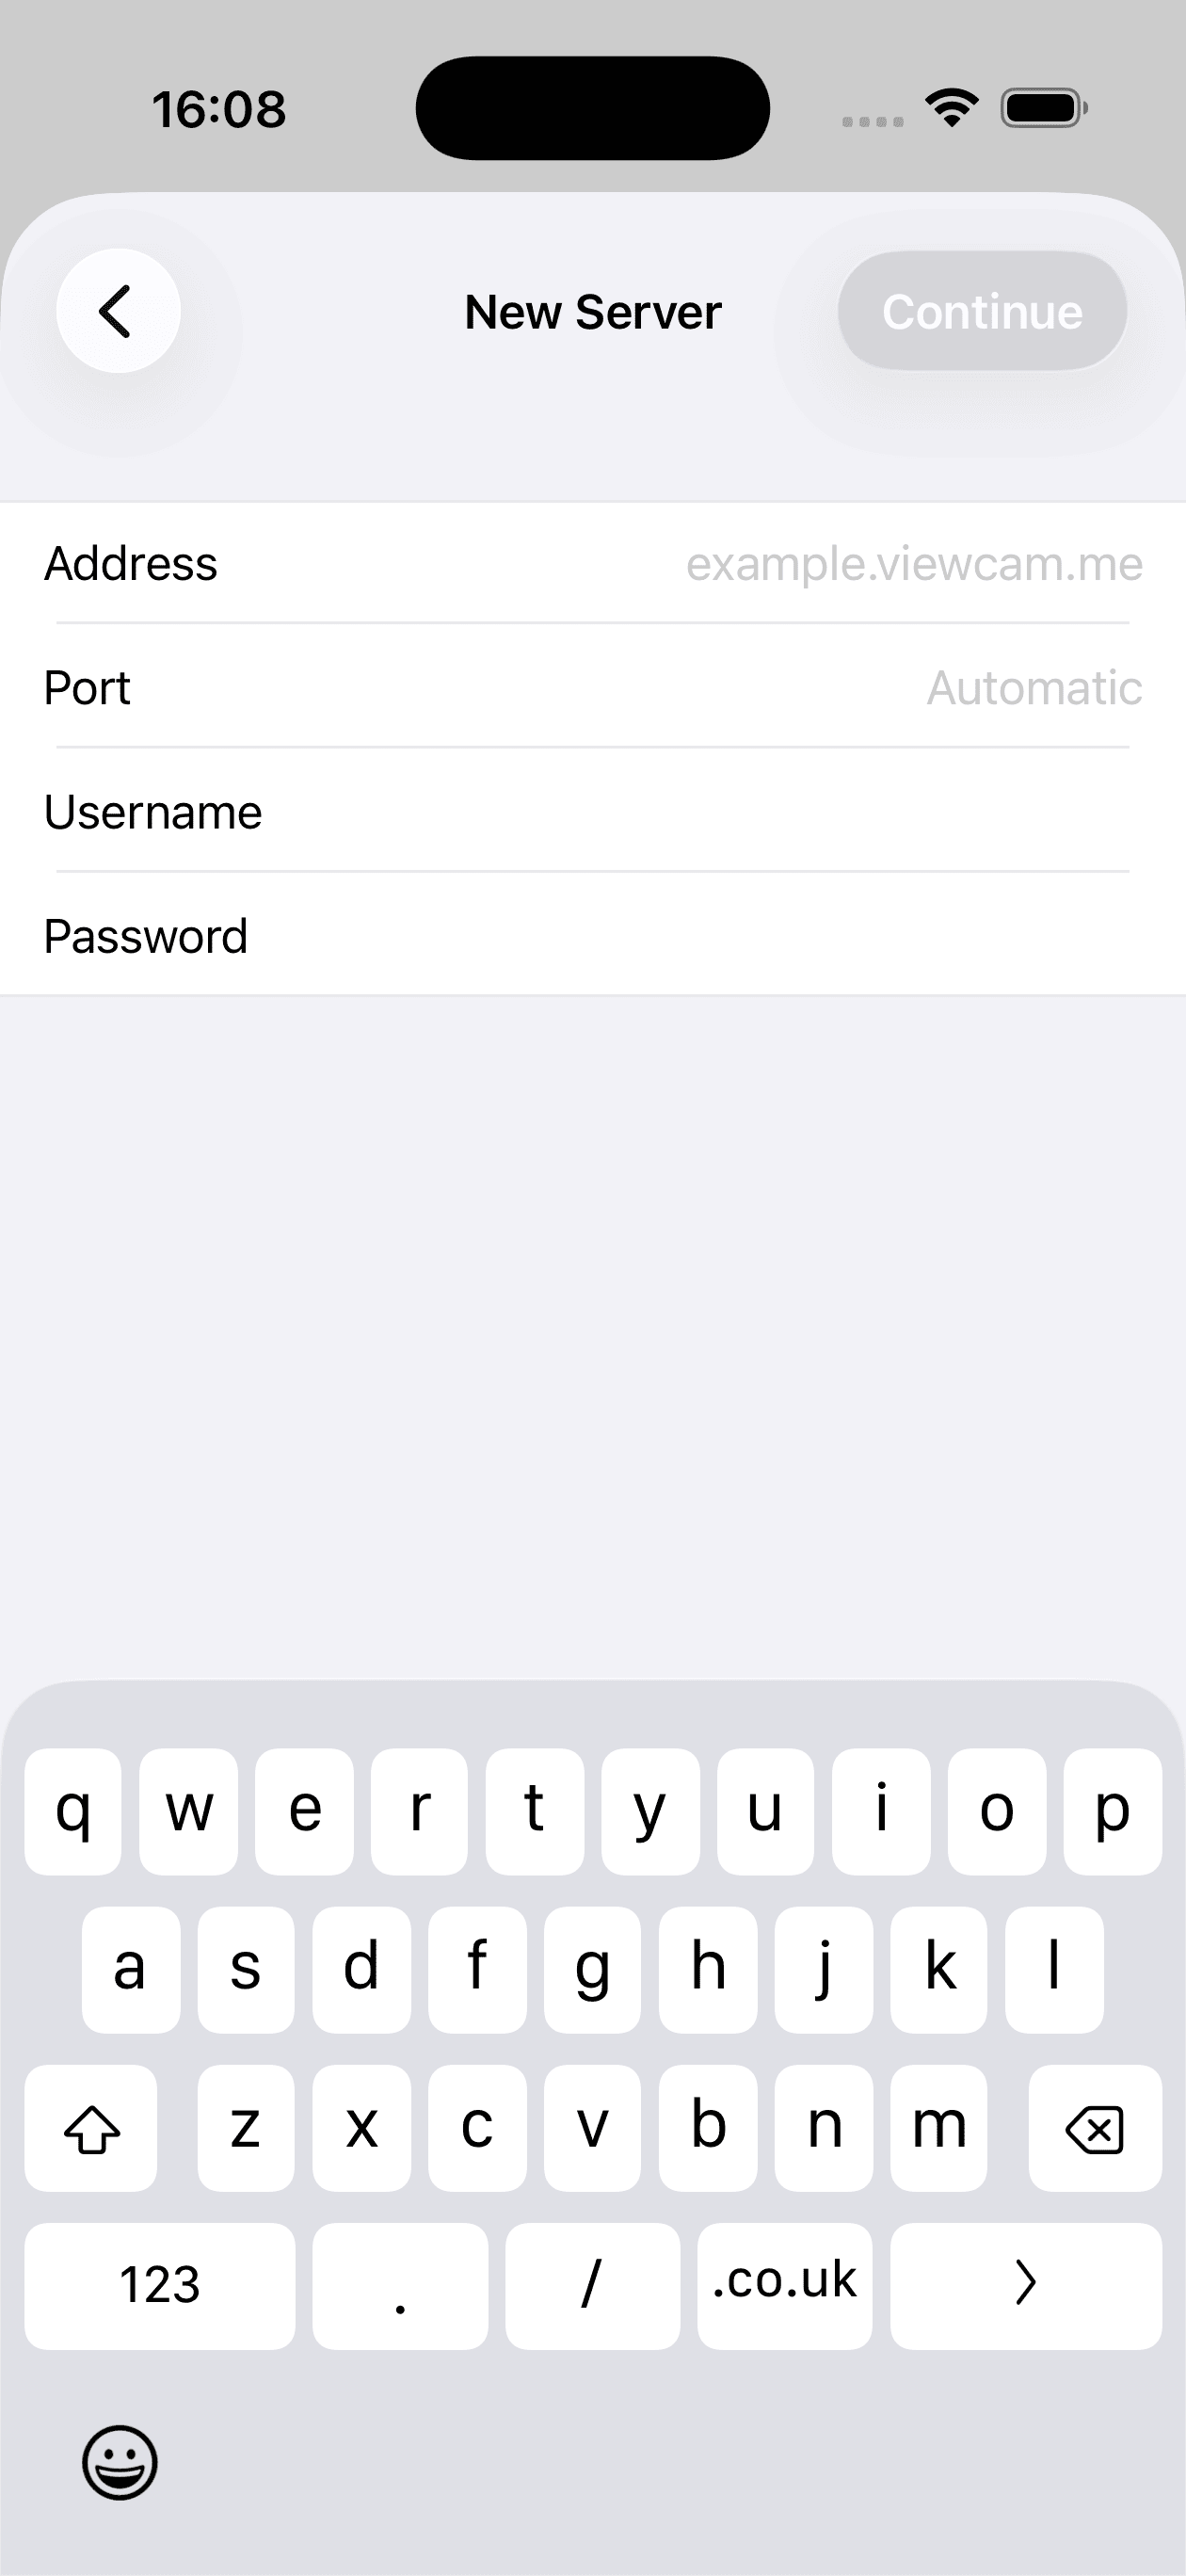
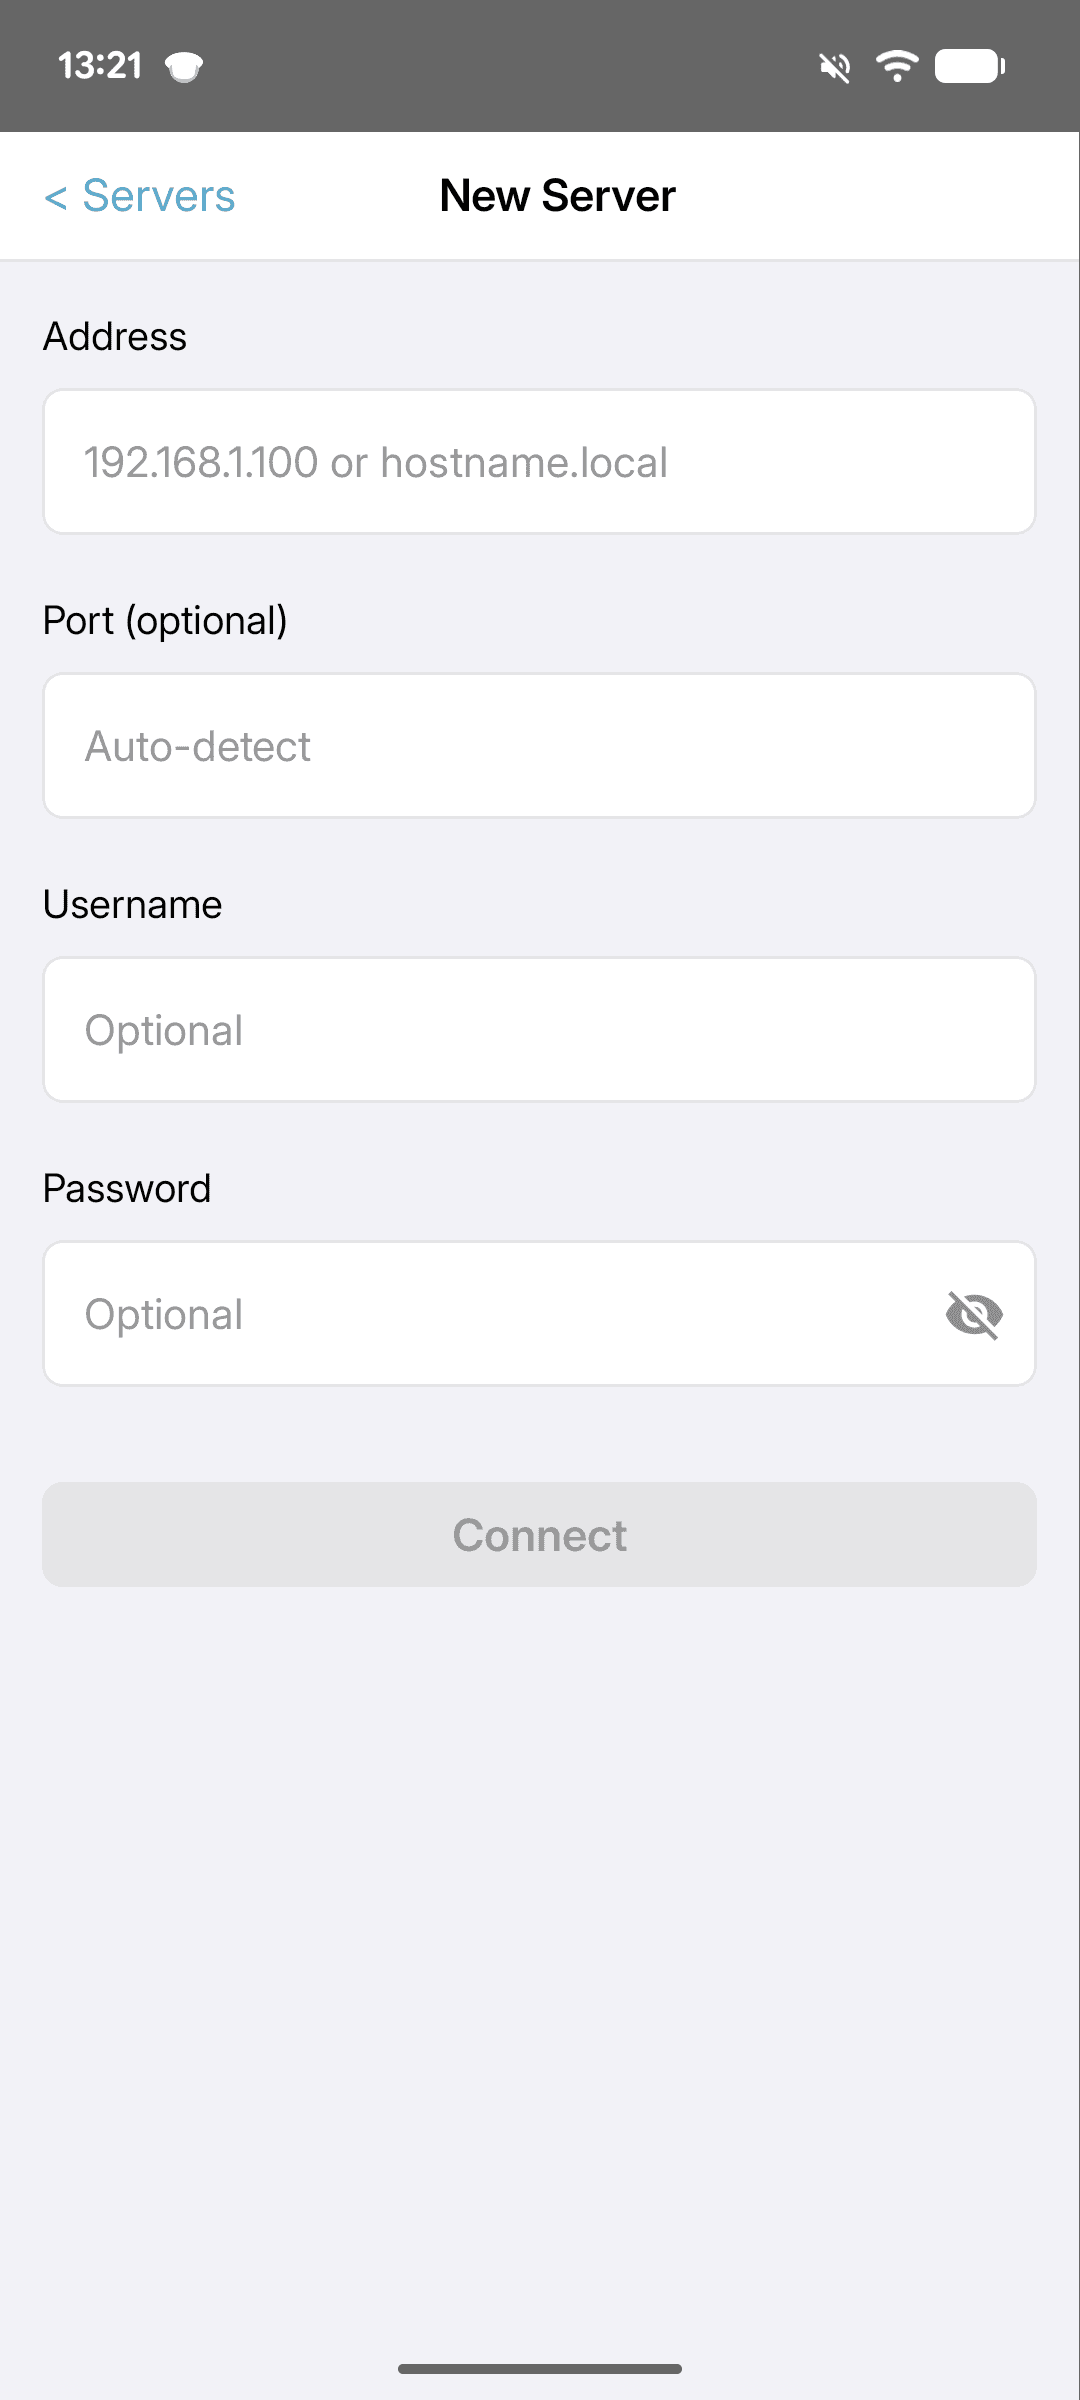
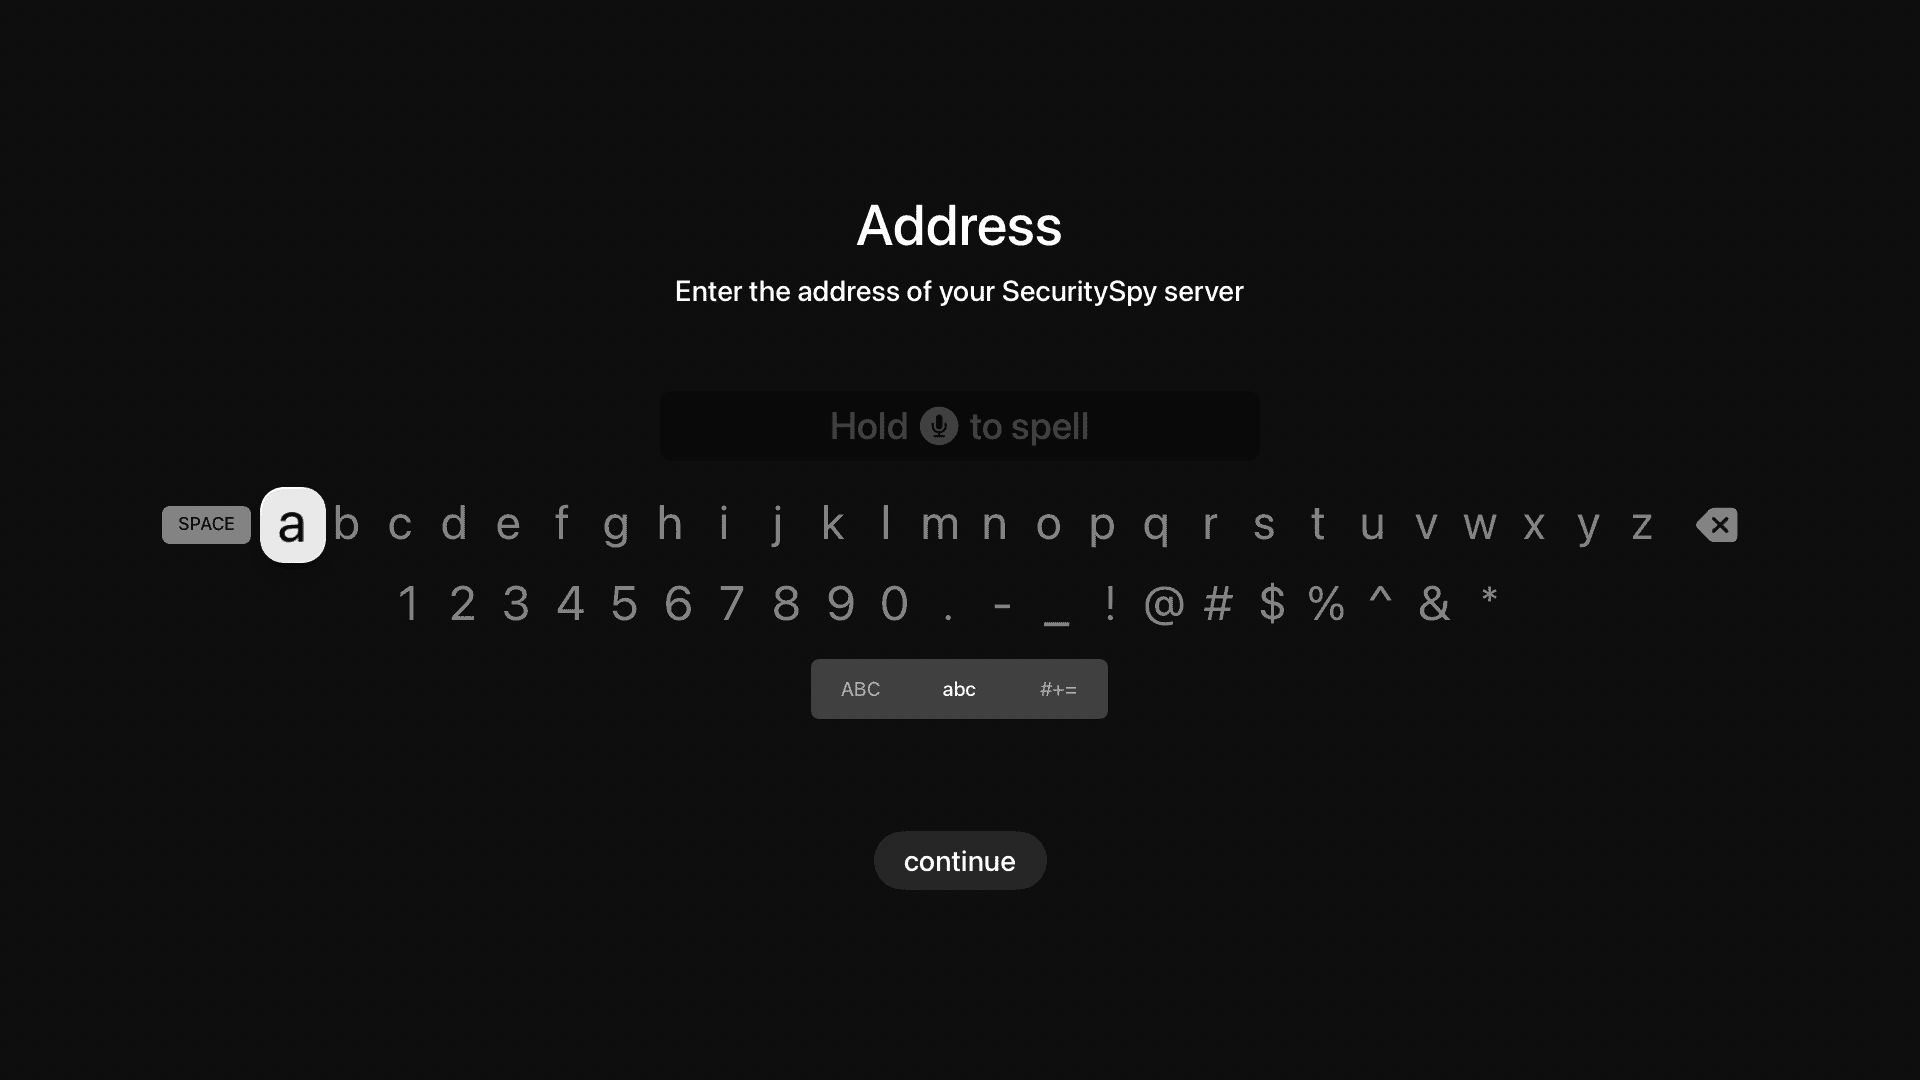
Address
Enter the IP address or host name of your SecuritySpy server, for example 192.168.1.1 or example.viewcam.me.
Port
Enter the server's port. If your server is using standard ports (8000 for HTTP and 8001 for HTTPS) you don't need to enter anything here.
Username and Password
Enter the login details that you have configured for the server in the Settings -> Web section in SecuritySpy.
The name of the server as specified in the Settings -> General section in SecuritySpy will be used to refer to the server within the app, so if you have multiple SecuritySpy servers, make sure to set a descriptive name here so that you can easily distinguish them.
From the list of servers, tap any one to view its cameras. While viewing a particular server, to get back to the main list of servers, tap the server name at the top of the screen (e.g. the text My SecuritySpy Server in the below screenshots).
Overscan Calibration
By default, many TVs have some degree of overscan, meaning they truncate the edges of the display. This can cause problems for apps because overscan is impossible to detect and compensate for automatically. There are two things you can do to address this:
- Turn off any overscan option in your TV's own settings. Apple provides a calibration screen that can help to verify this, available at Settings > Video and Audio > Calibration > Zoom and Overscan.
- If your TV lacks this setting or cannot disable overscan completely, calibrate the amount of overscan within our app so that it can compensate.
To open the calibration panel, use the button at the bottom of the Servers screen:
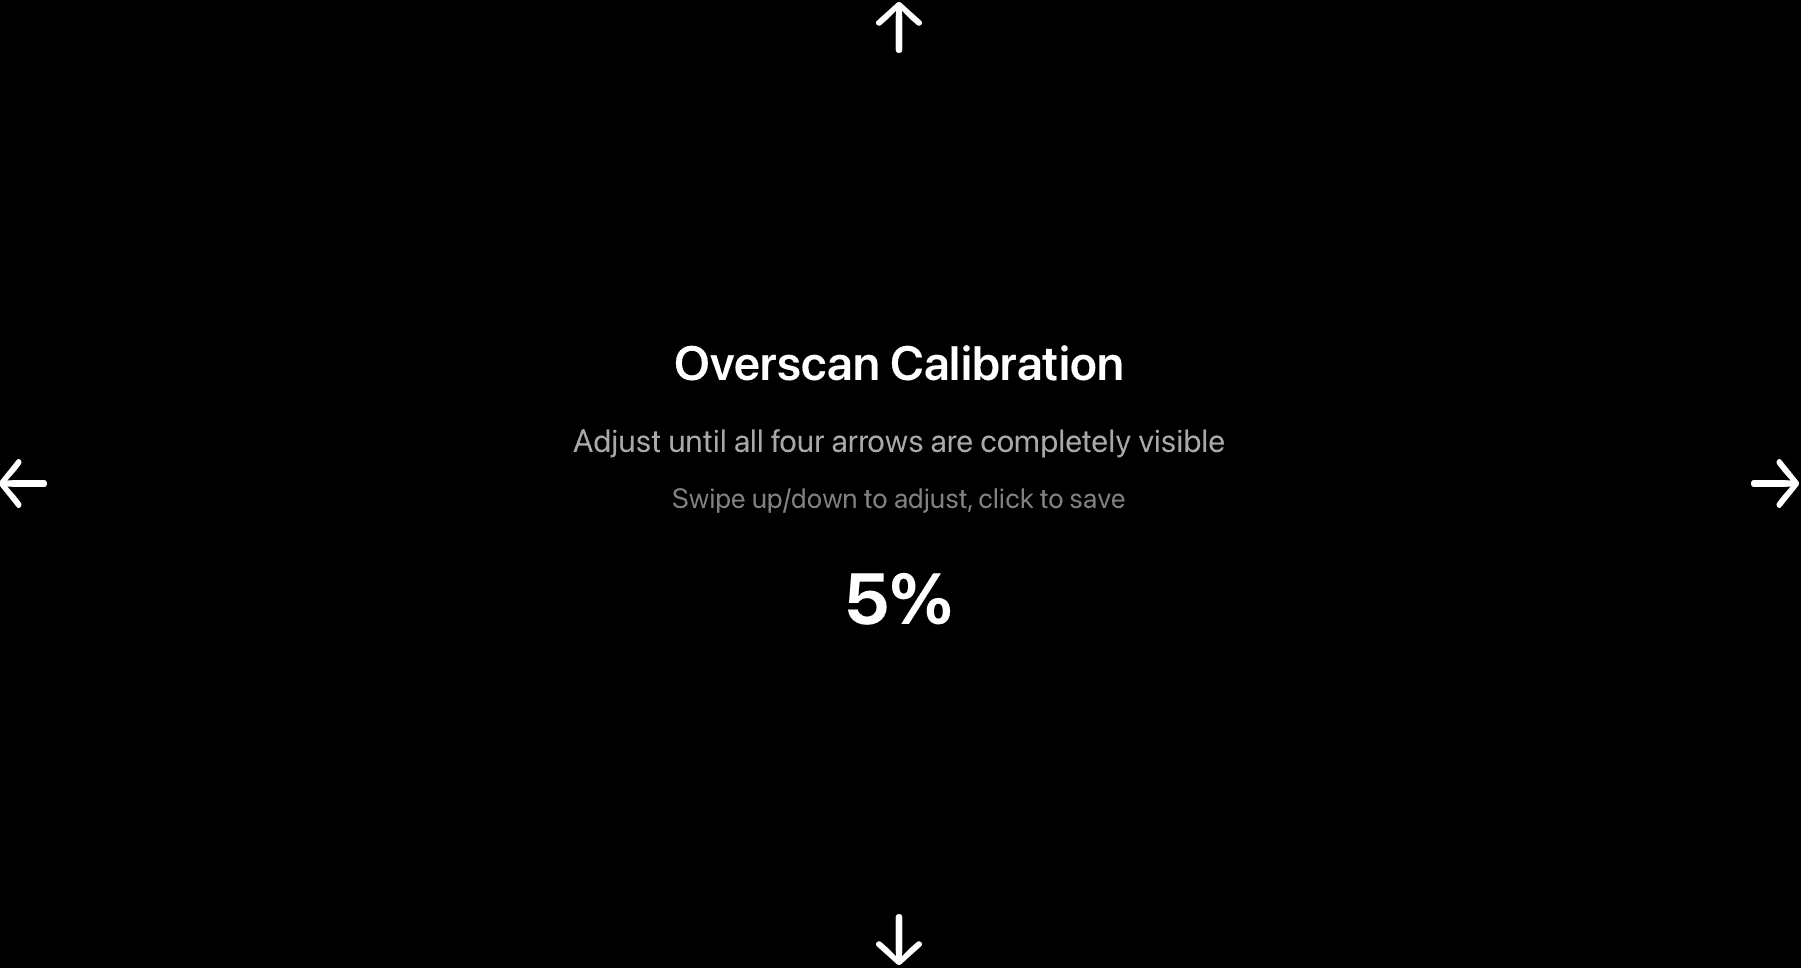
Swipe or press up/down on the remote until the arrows are fully visible and positioned flush with the edges of the display.
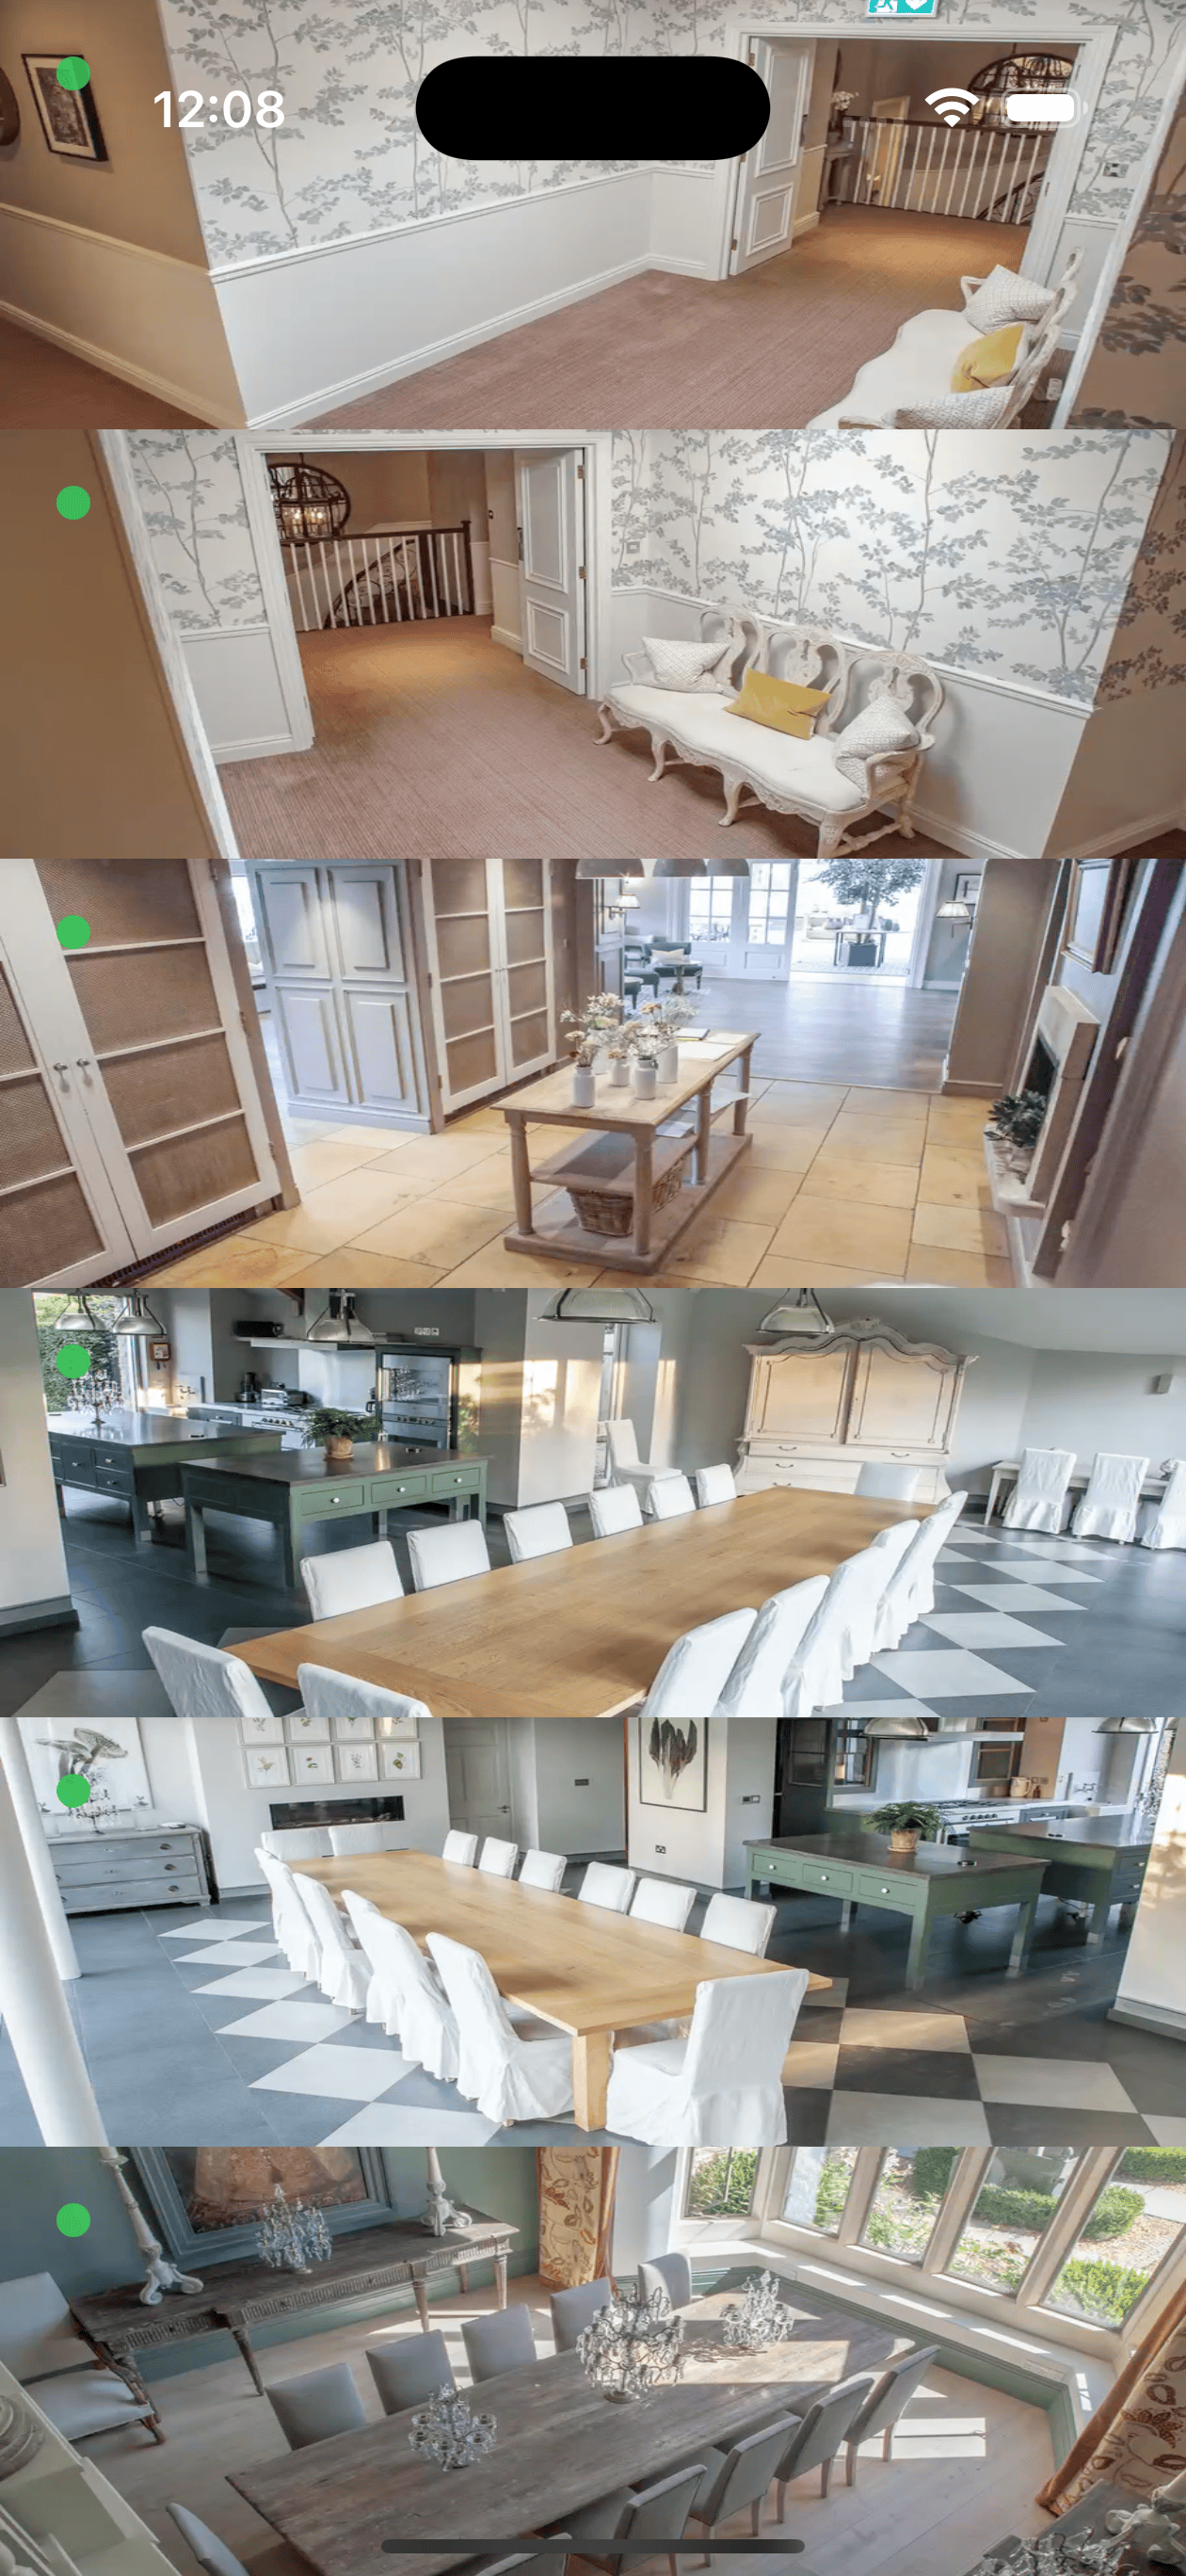
Live Grid View
This view initially shows all your cameras, with live preview images that update every second. Indicator symbols at the top-left of each camera show its connection status, with green indicating a live connection and red indicating a failed connection. To limit the view to certain cameras, use the group filter button (top-left).
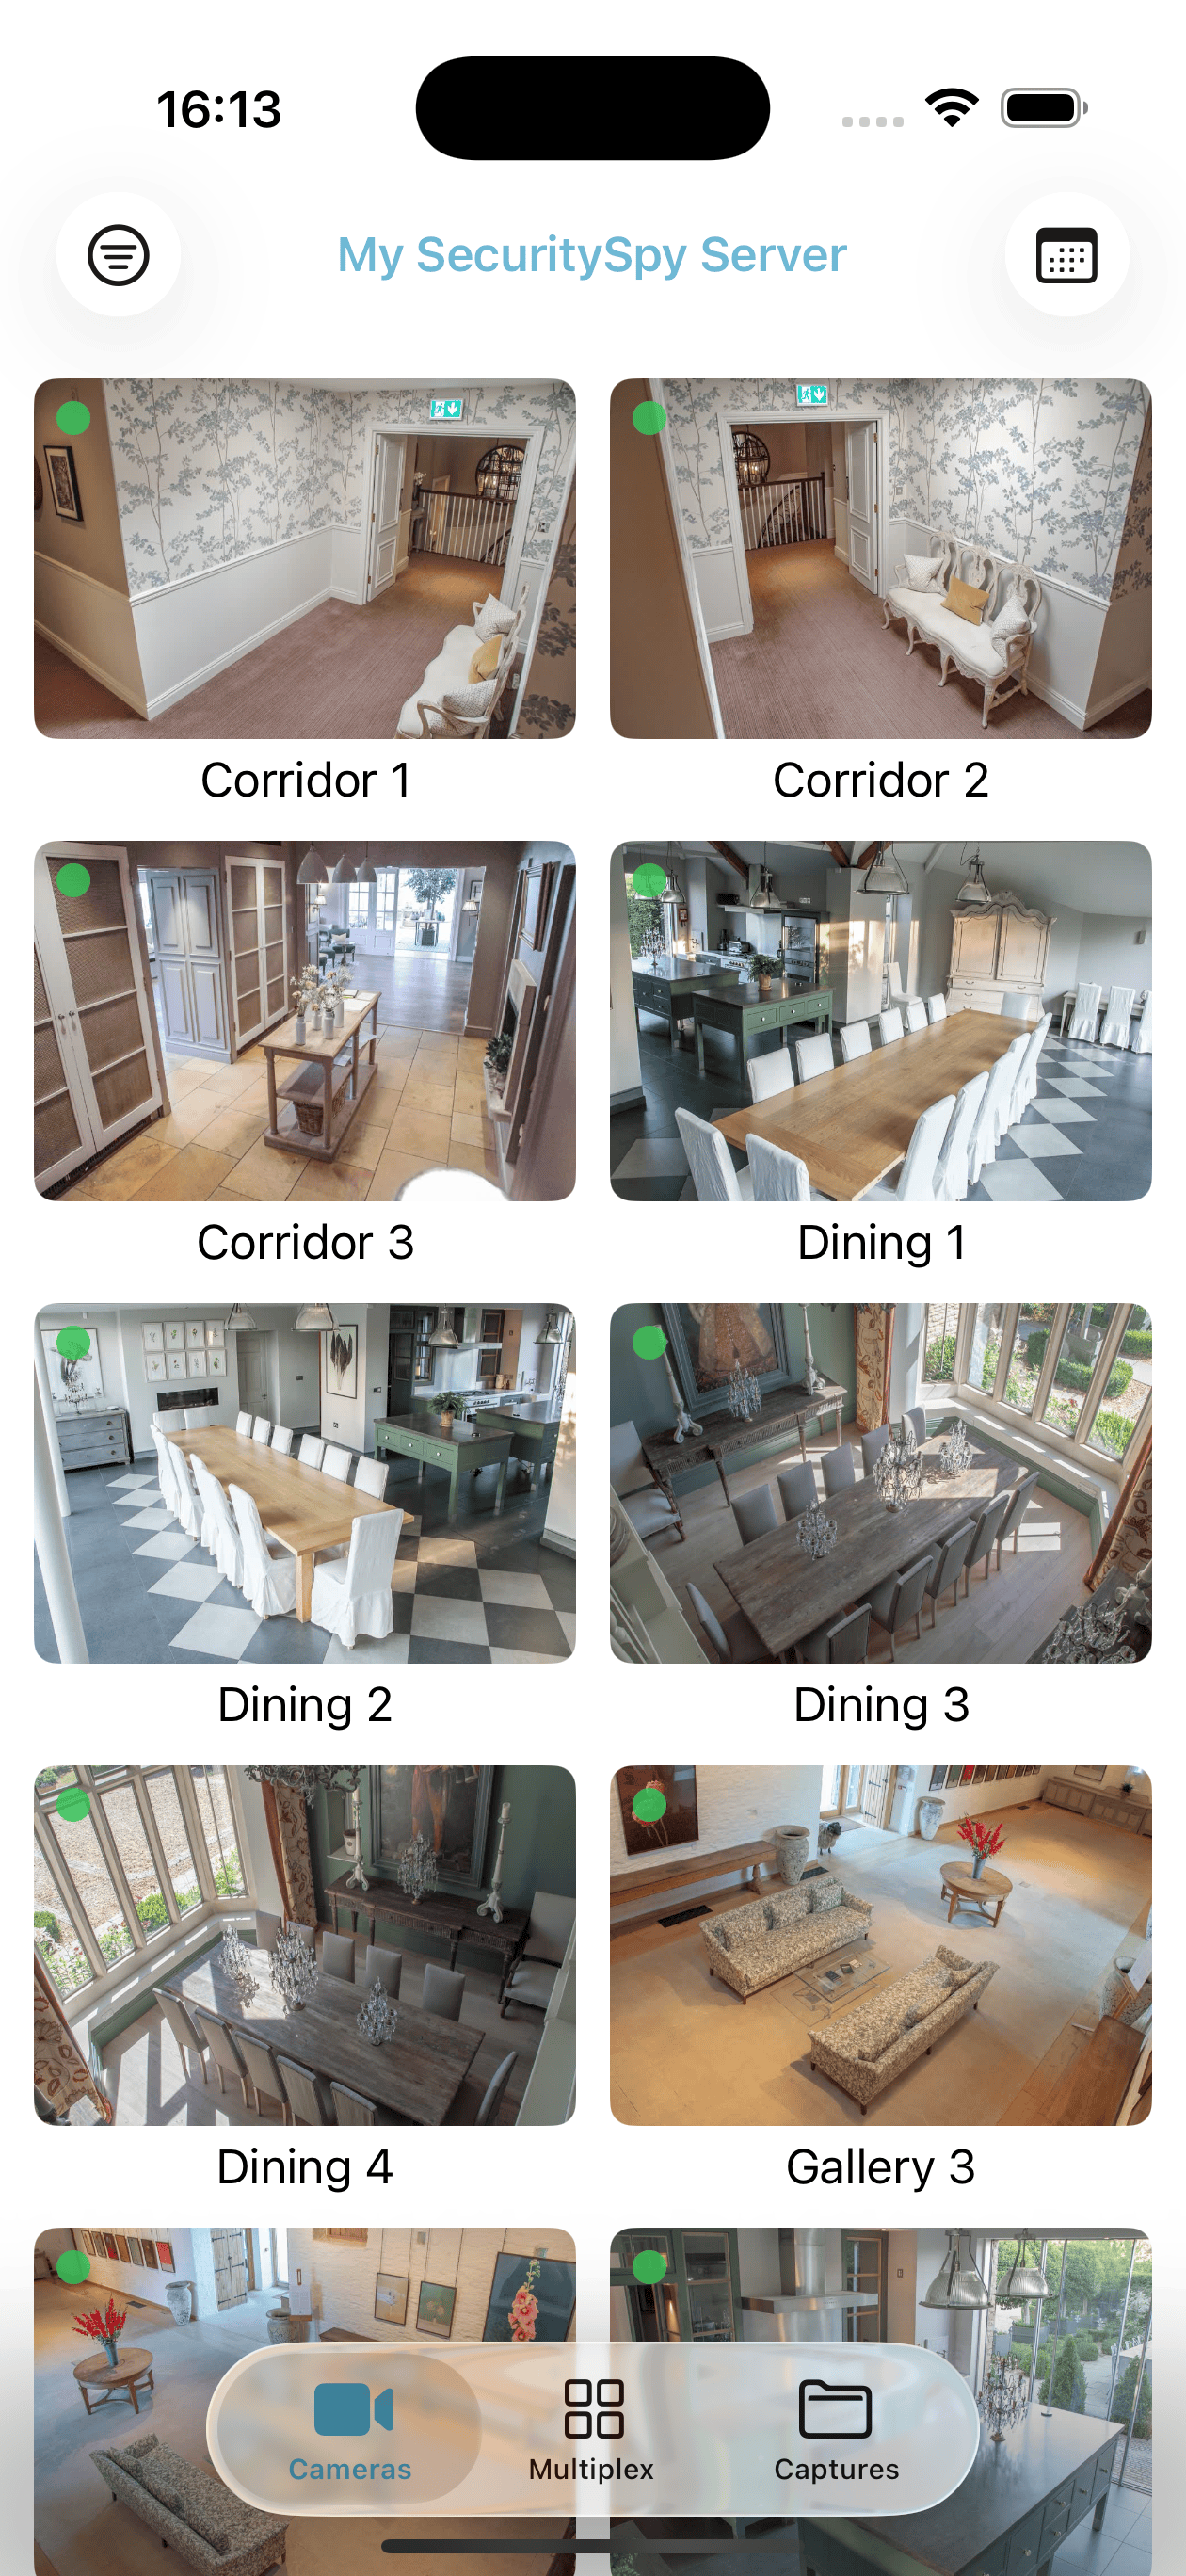
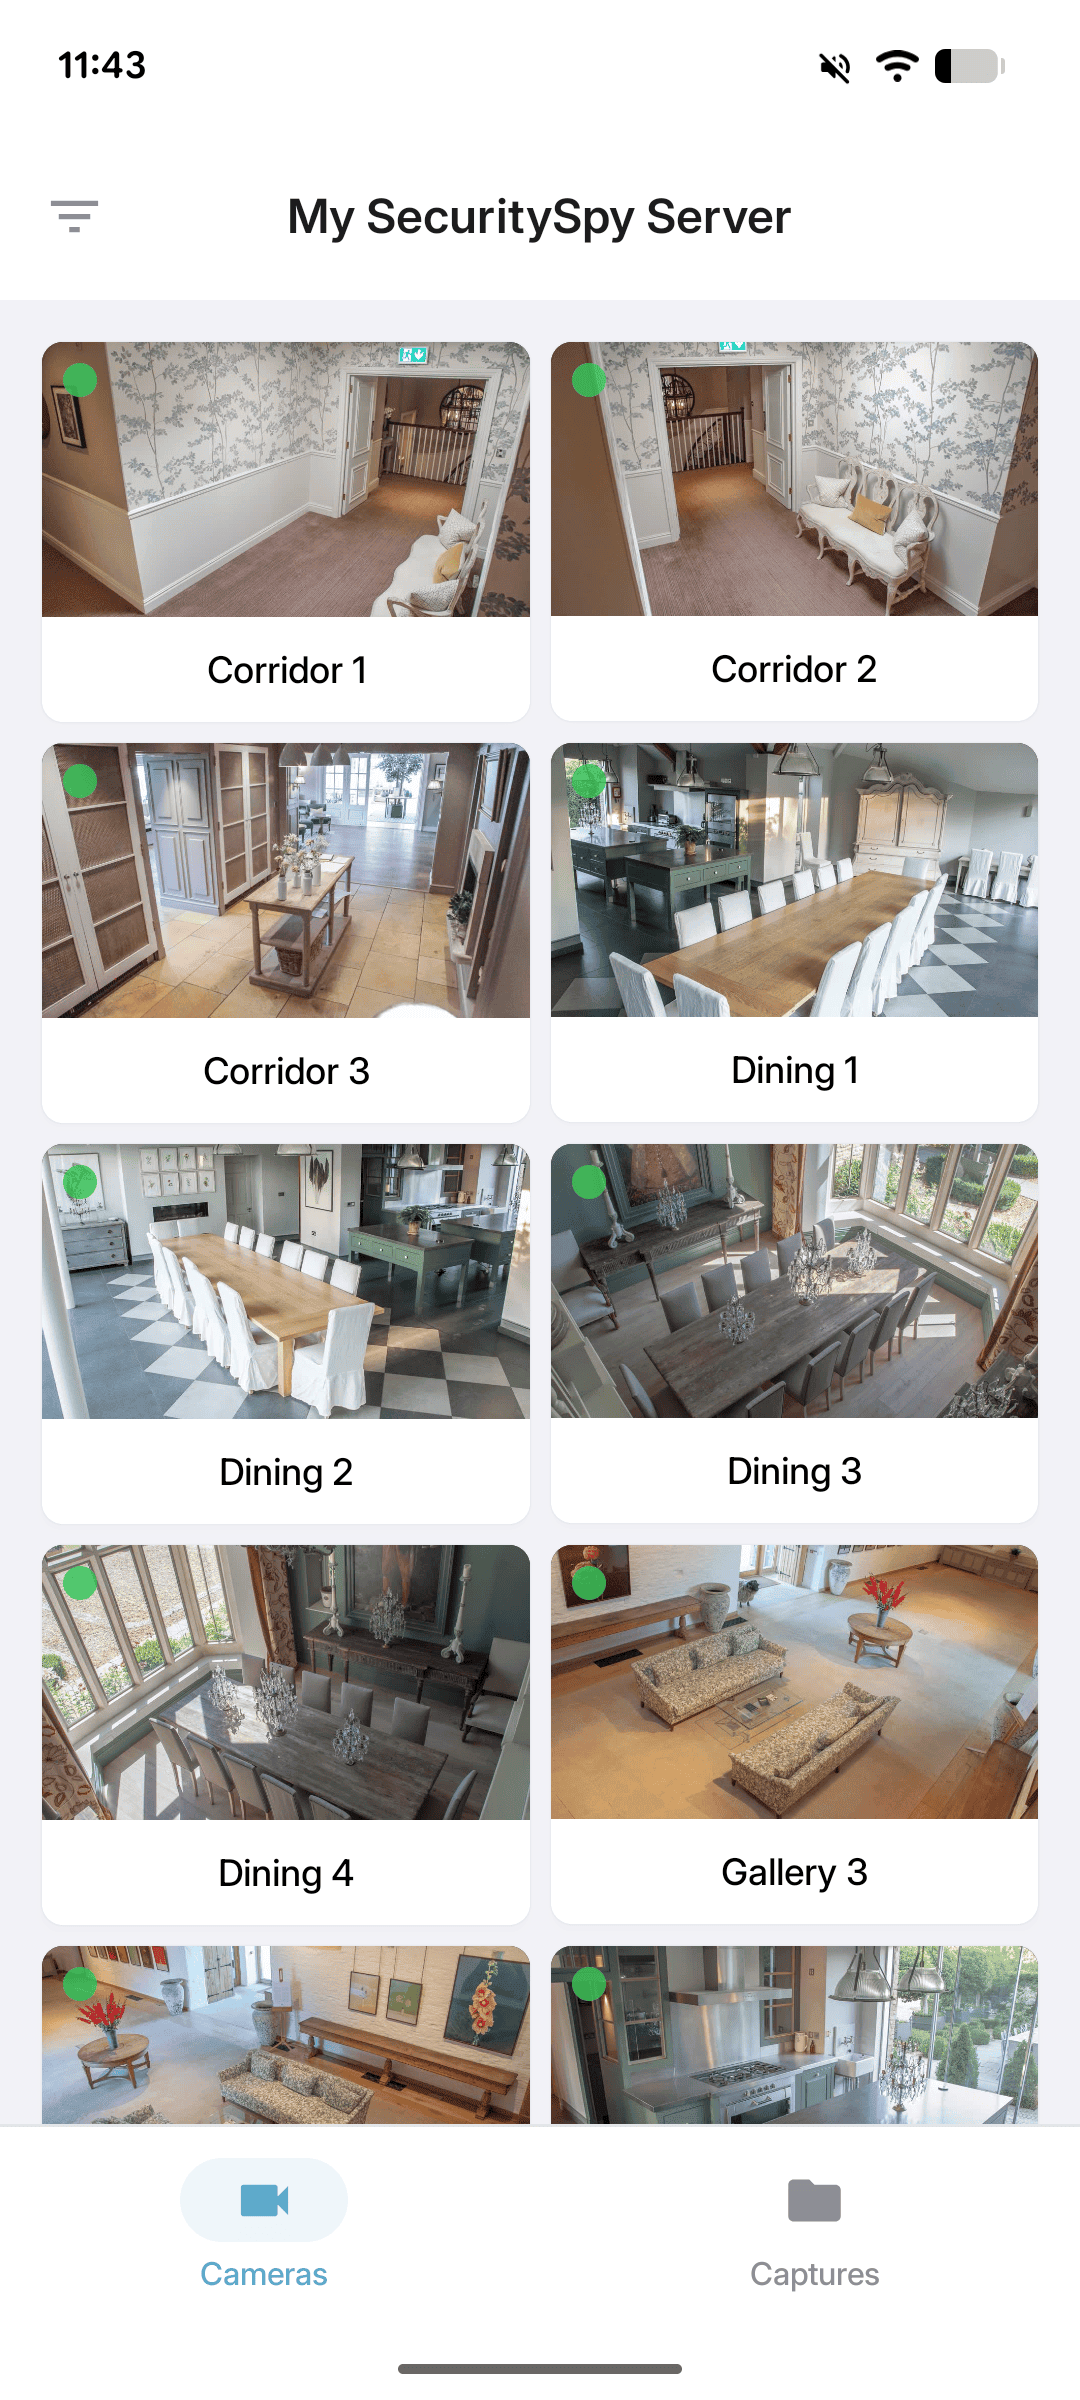
From the grid view, tap any camera to view it full-screen, described in the section below.
Live Full-Screen View
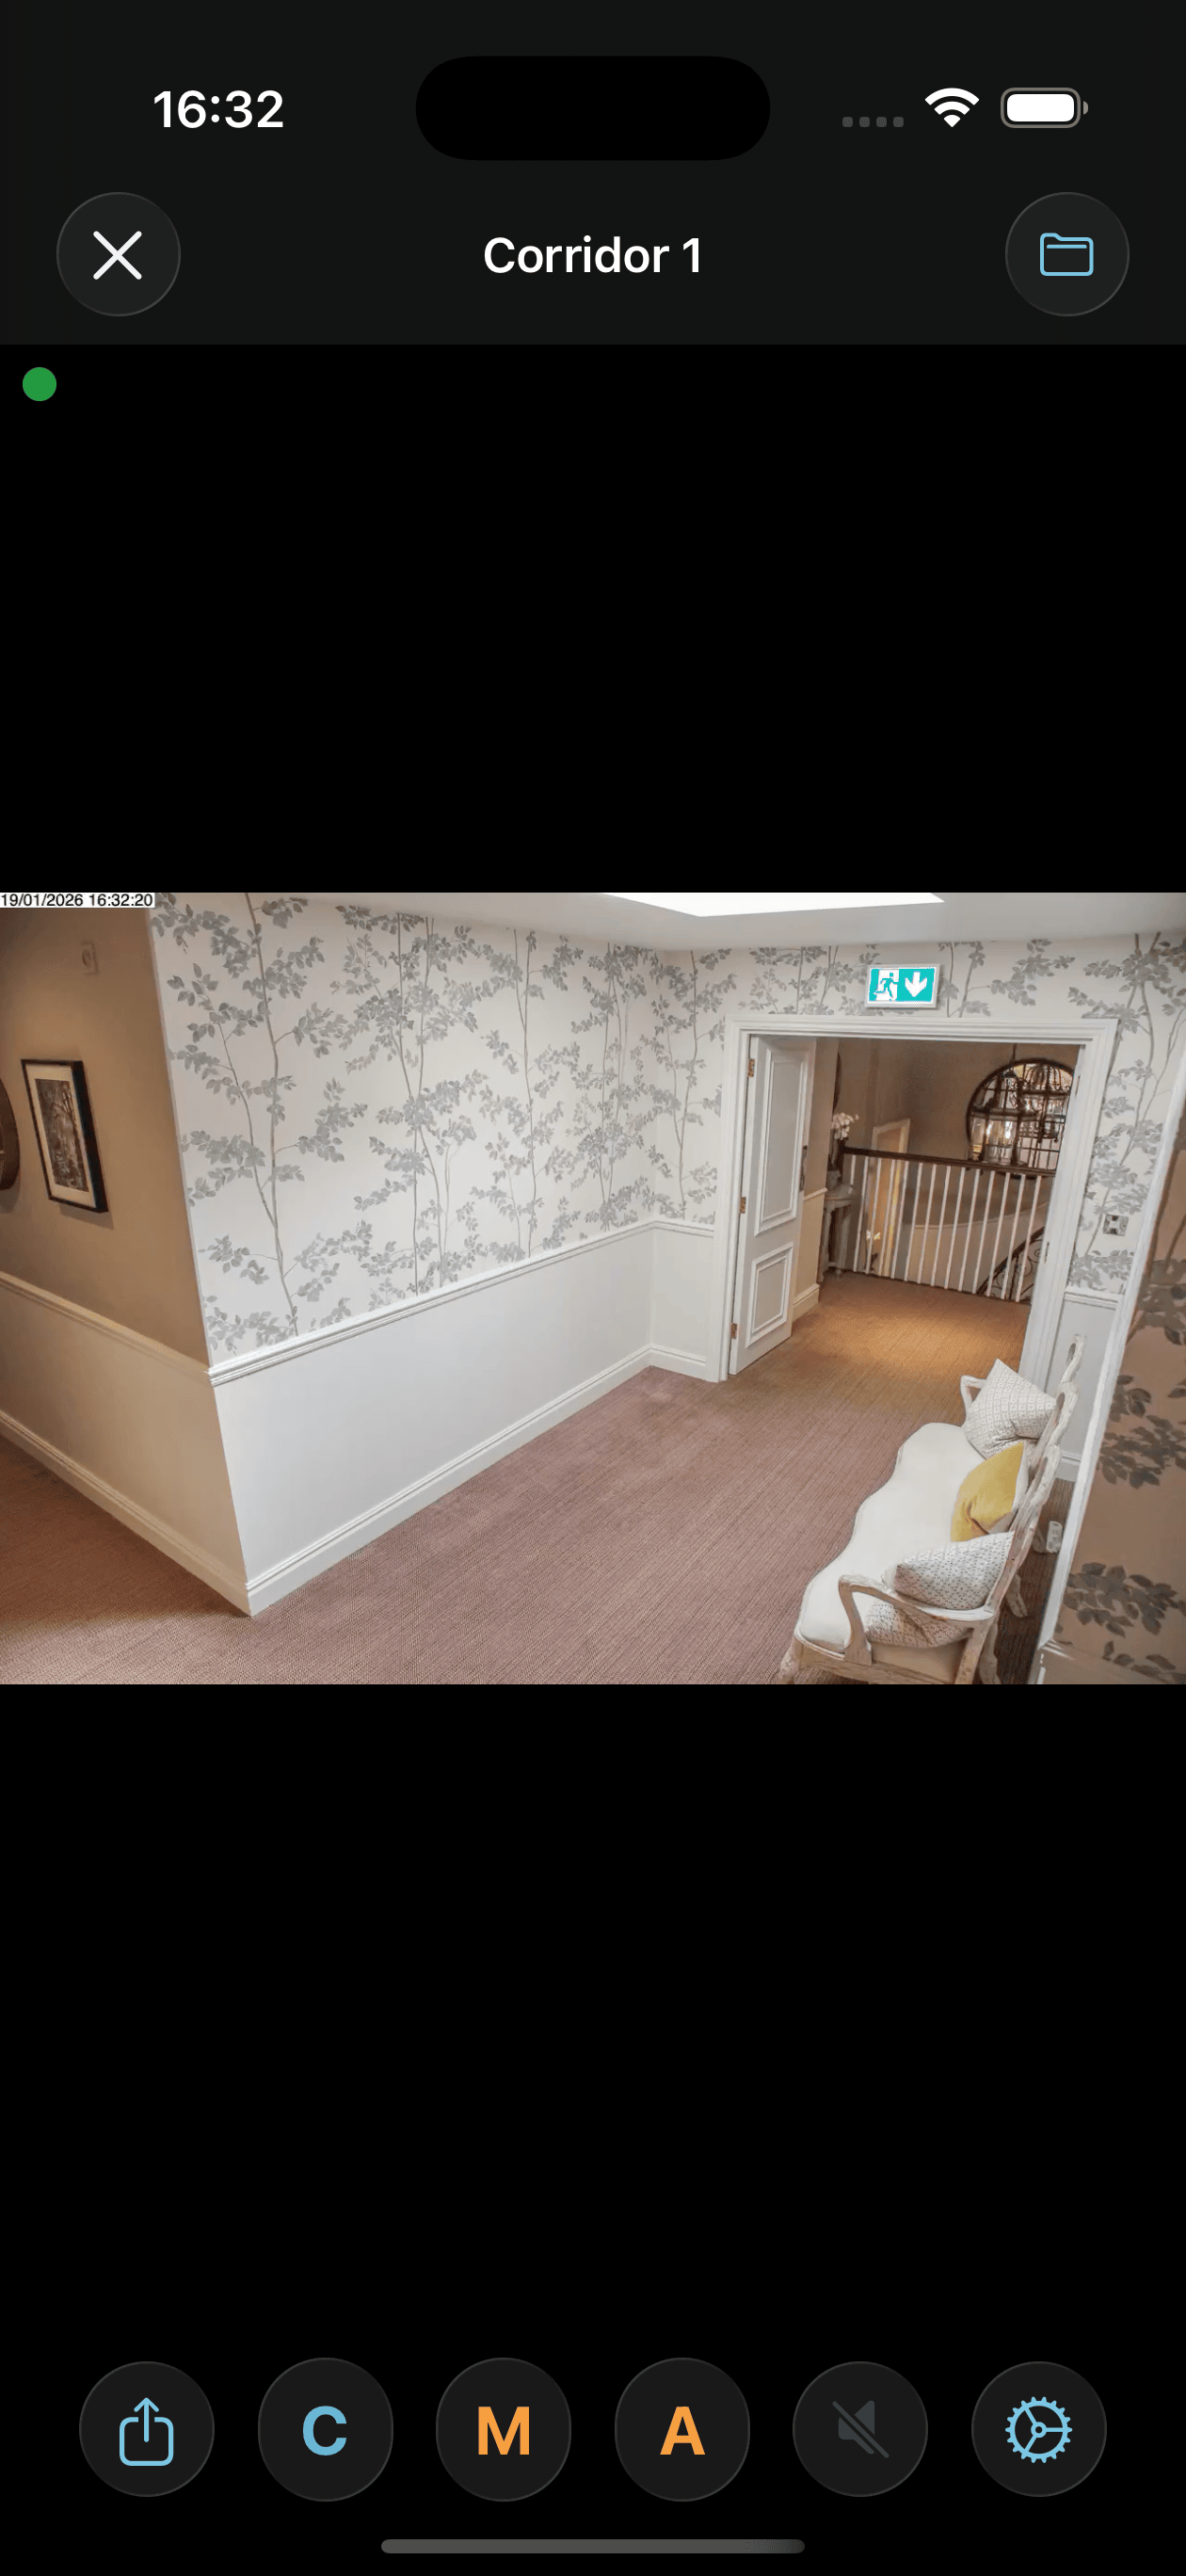
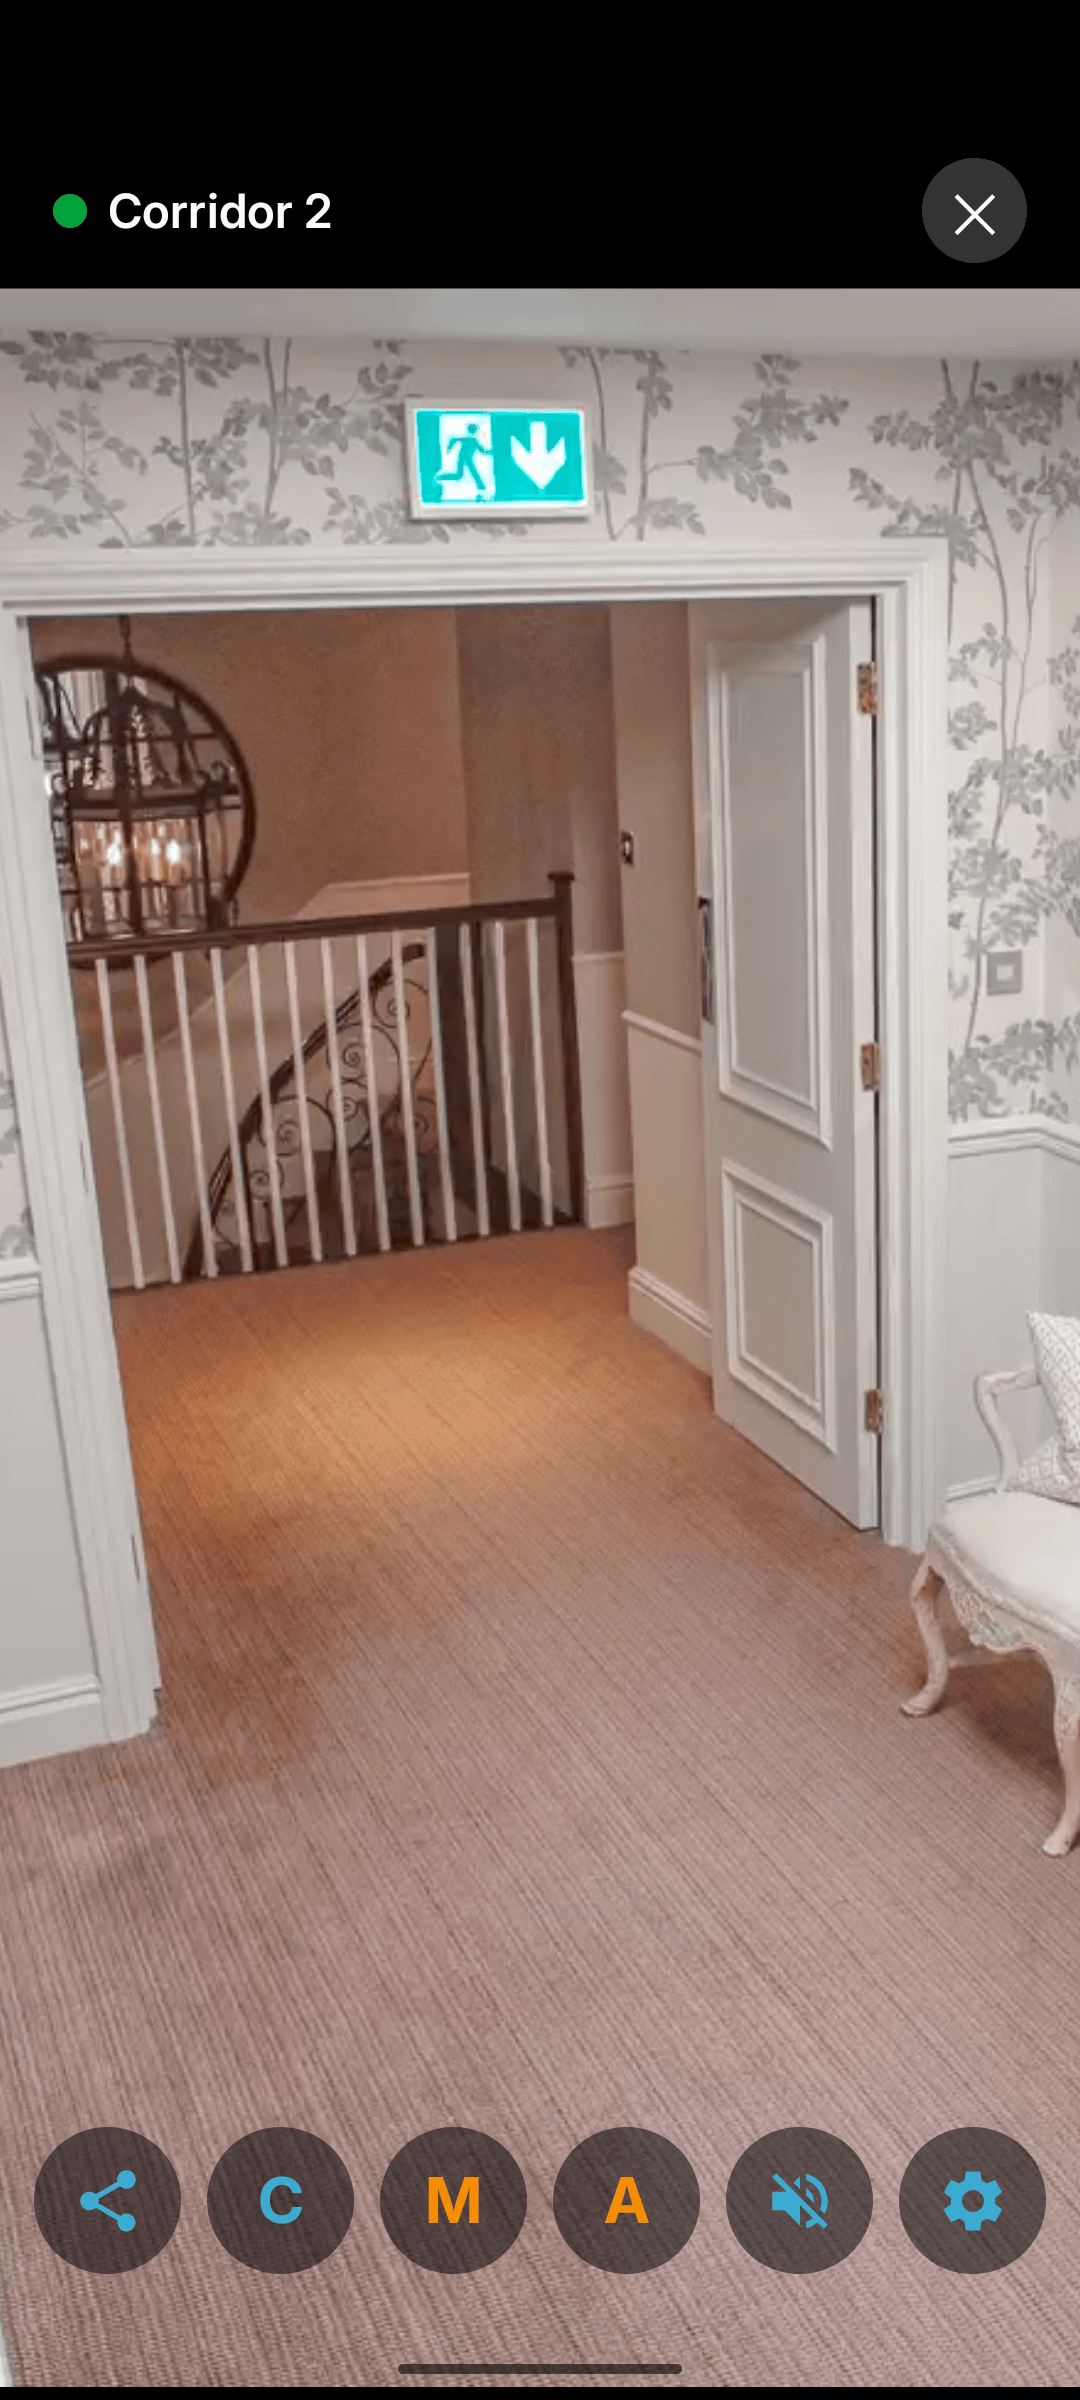
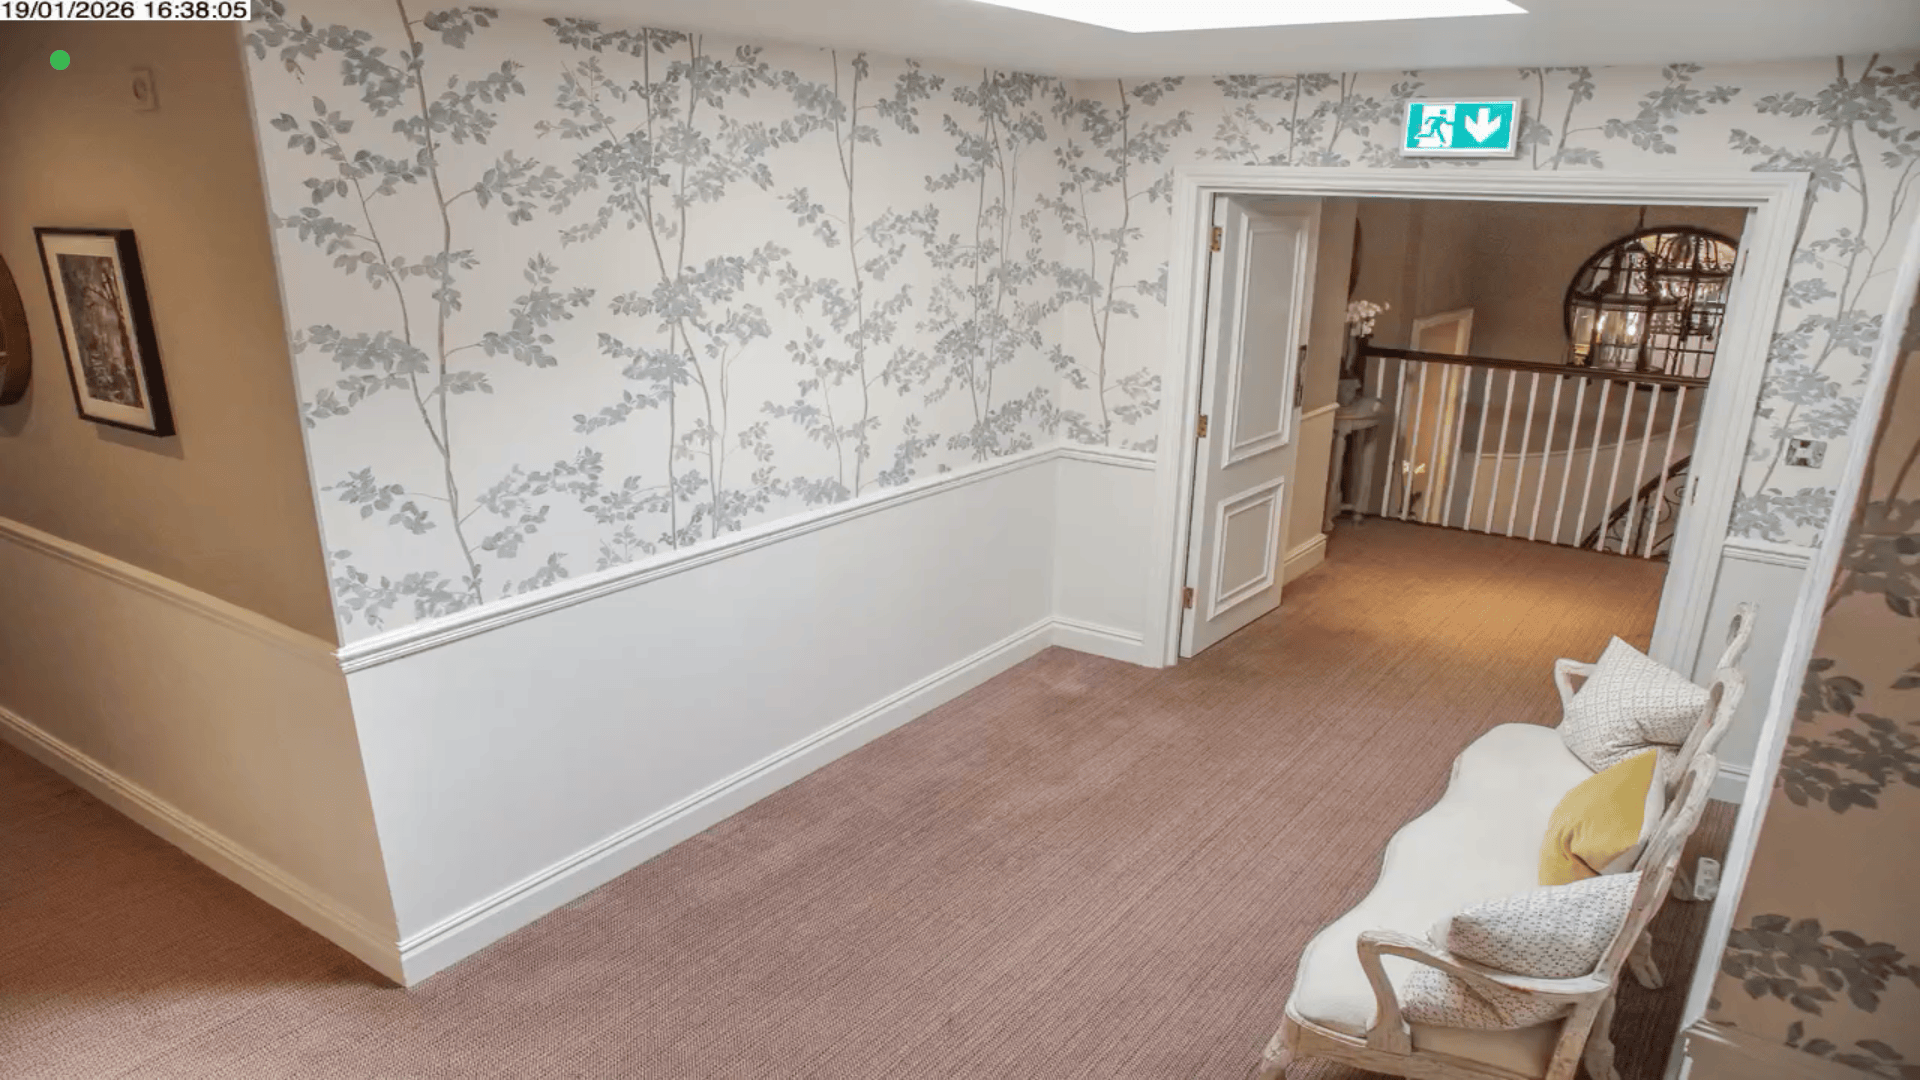
This screen shows the camera at high resolution and frame rate, with audio if available from the camera.
On iOS, the C, M and A indicators at the bottom of the screen show whether Continuous-Capture recording, Motion-Capture recording, and Actions are disarmed (blue), armed and waiting (orange) or armed and recording/active (red). Tap any of these indicators to select schedules and overrides that determine when each mode should be armed (learn more about schedules here). If you want to receive notifications to your mobile device, make sure that Actions mode is armed: it should be shown here in orange, turning red when motion is detected.
On iOS and Android, a share button is available at the bottom of the screen, which allows you to send a live image from the camera to a variety of destinations, like email and text message.
Schedule Setter
The calendar button at the top-right corner of the screen accesses a panel that allows you to easily set schedules and overrides for your cameras, just like the Schedule Setter window in SecuritySpy's Window menu on macOS (for more information on schedules, please see the Schedules section of the SecuritySpy User Manual).
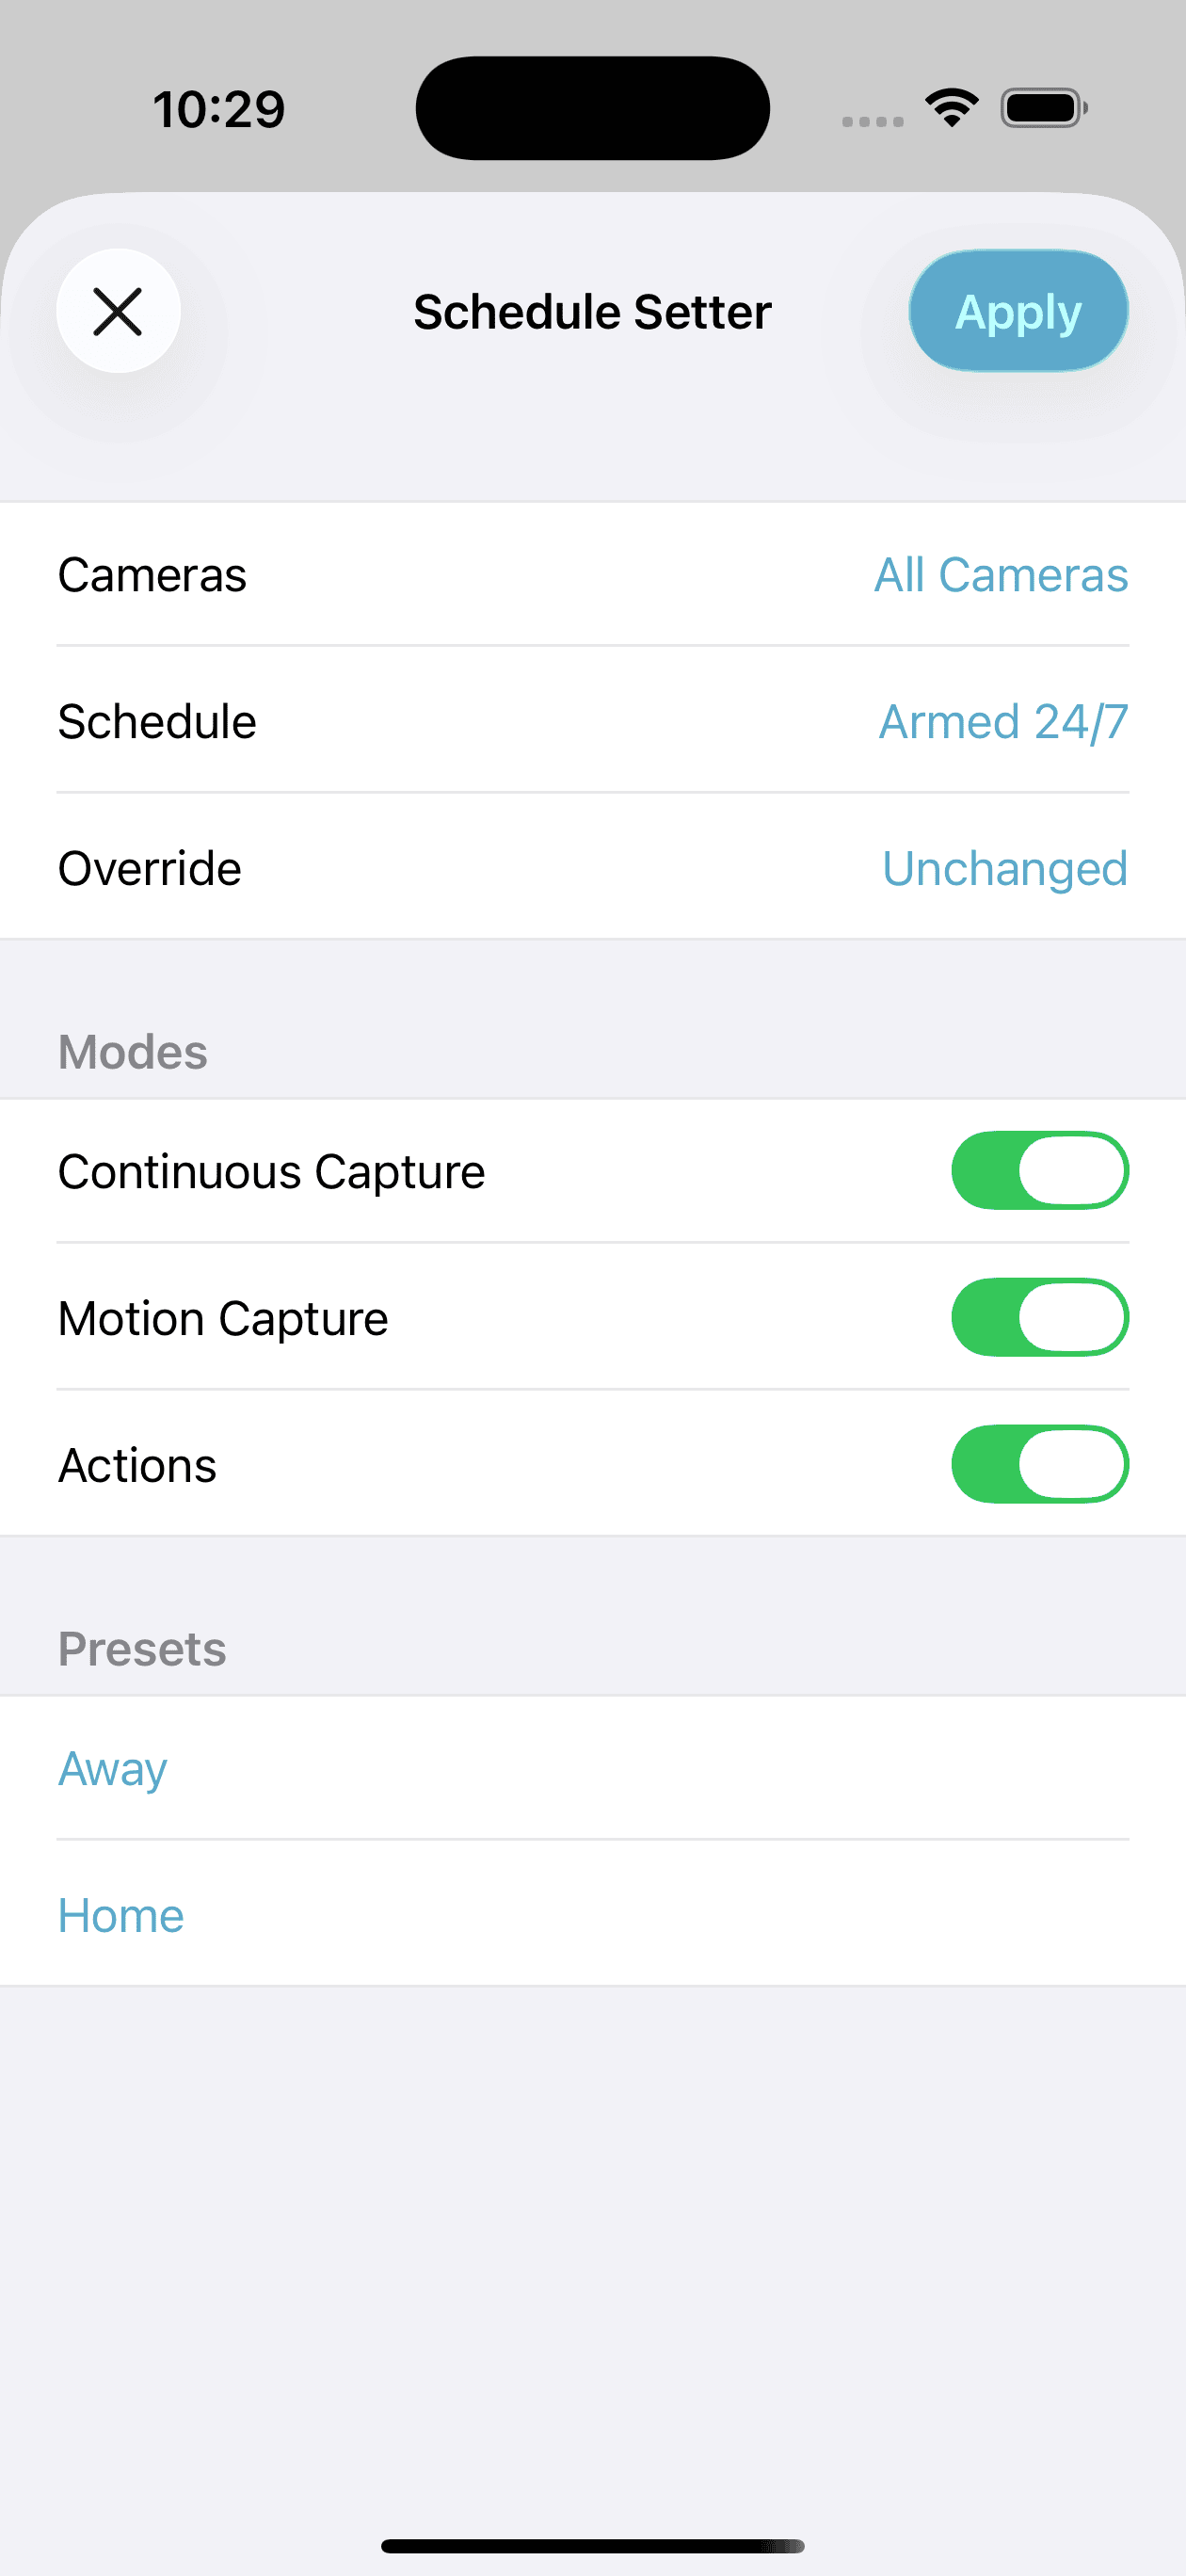
Select the cameras to apply the schedule to, select a schedule and/or override, choose the modes to apply the schedule to, and tap the Apply button. Schedule Presets are also available in the lower section of this panel.
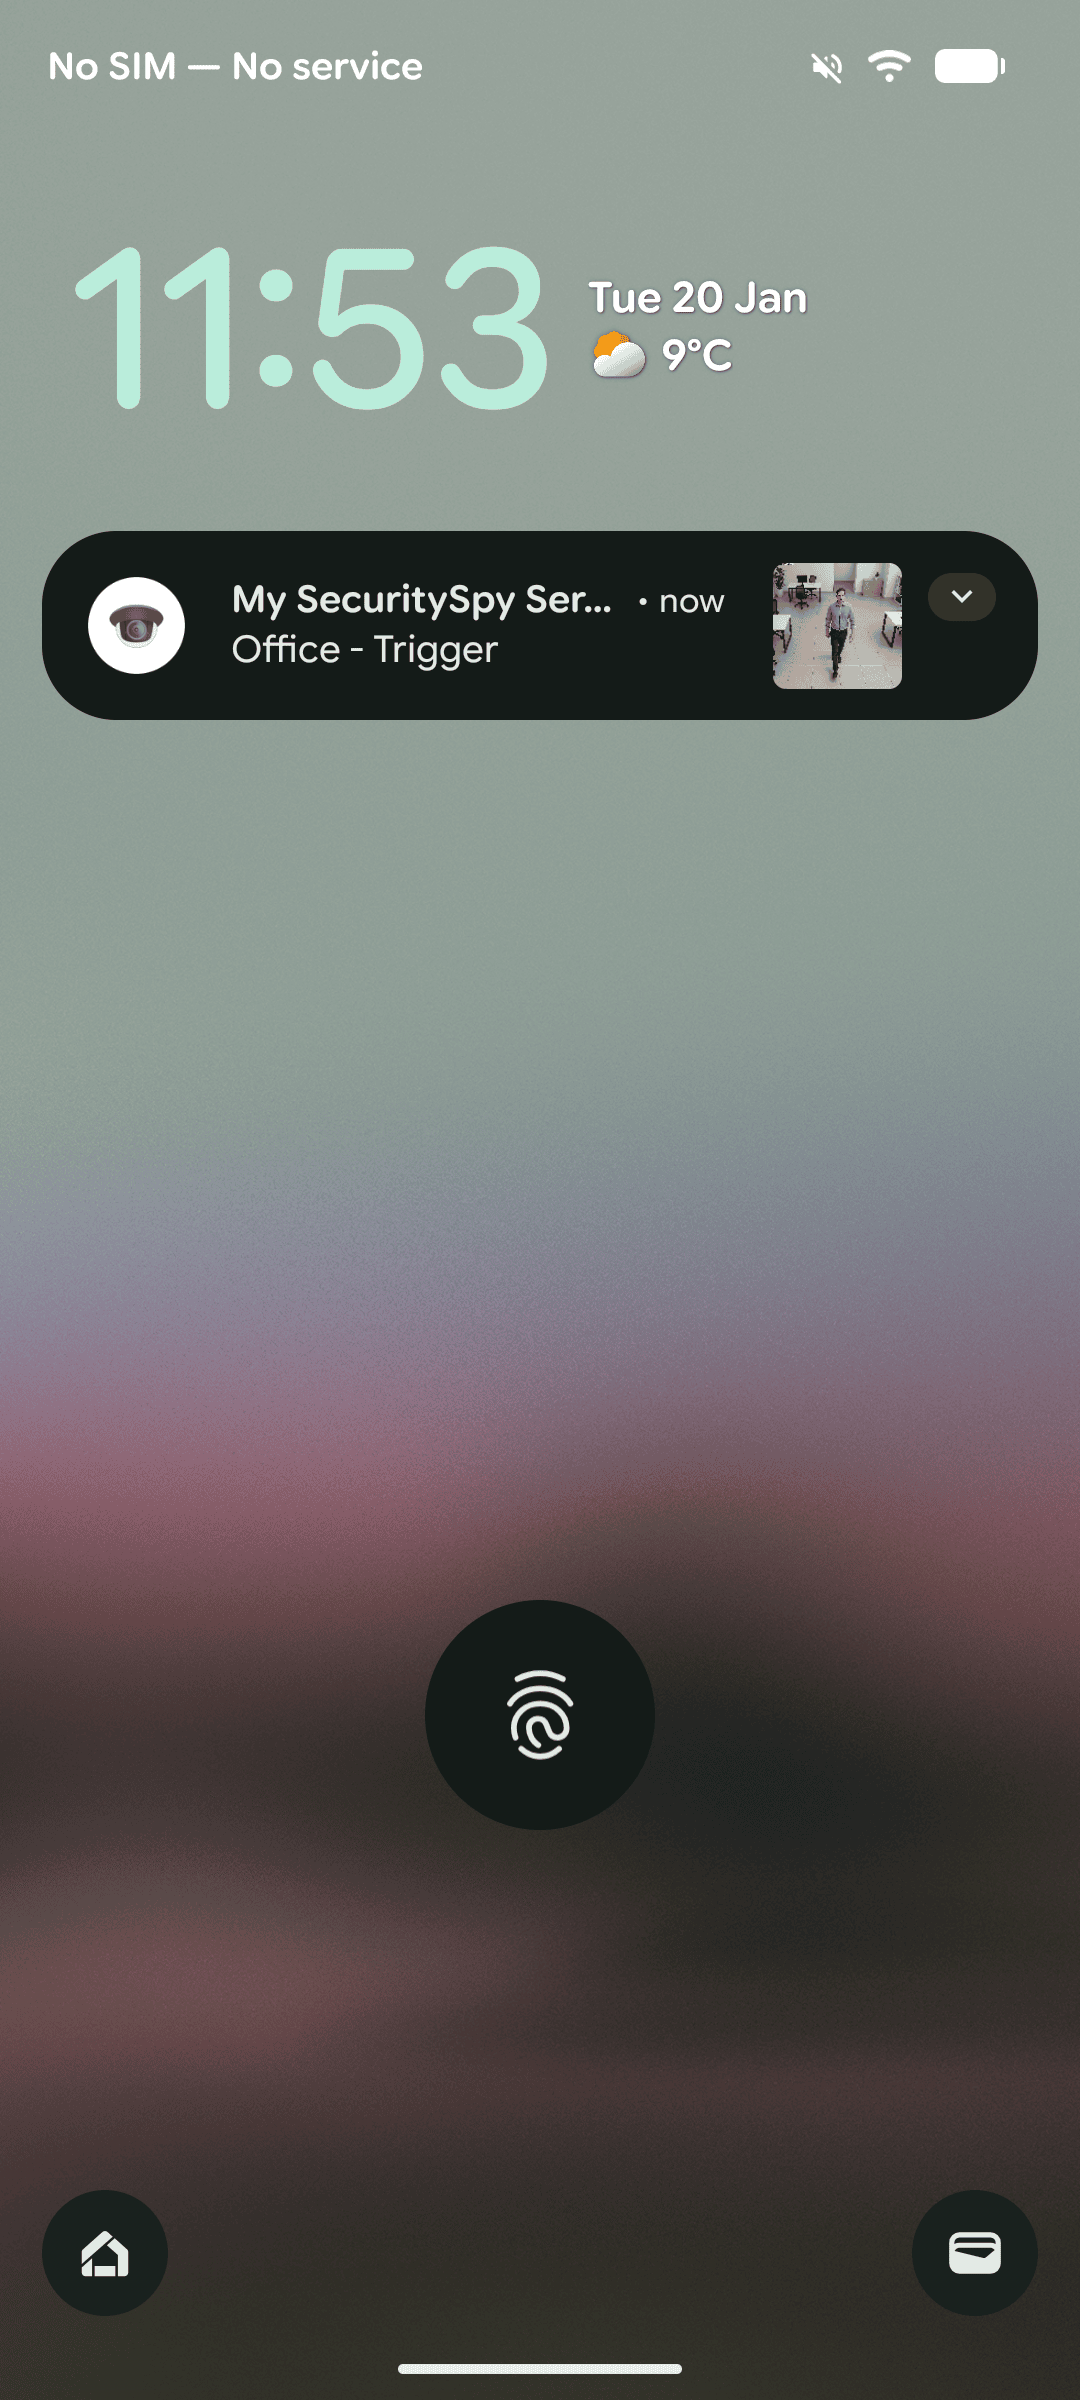
Notifications
Notifications are enabled on a per-camera basis using the controls at the bottom of the Live Full-Screen View. The server will then send notifications to the device when a camera is triggered, as long as its Actions mode is armed (notifications are classed as an Action in SecuritySpy - read more about arming camera modes).
If your device is able to connect back to your macOS SecuritySpy server, the notification will include a preview image - tap and hold the notification to enlarge the image. Or, tap briefly on the notification to open the SecuritySpy app on your device, which will immediately display the live streaming video from the camera.

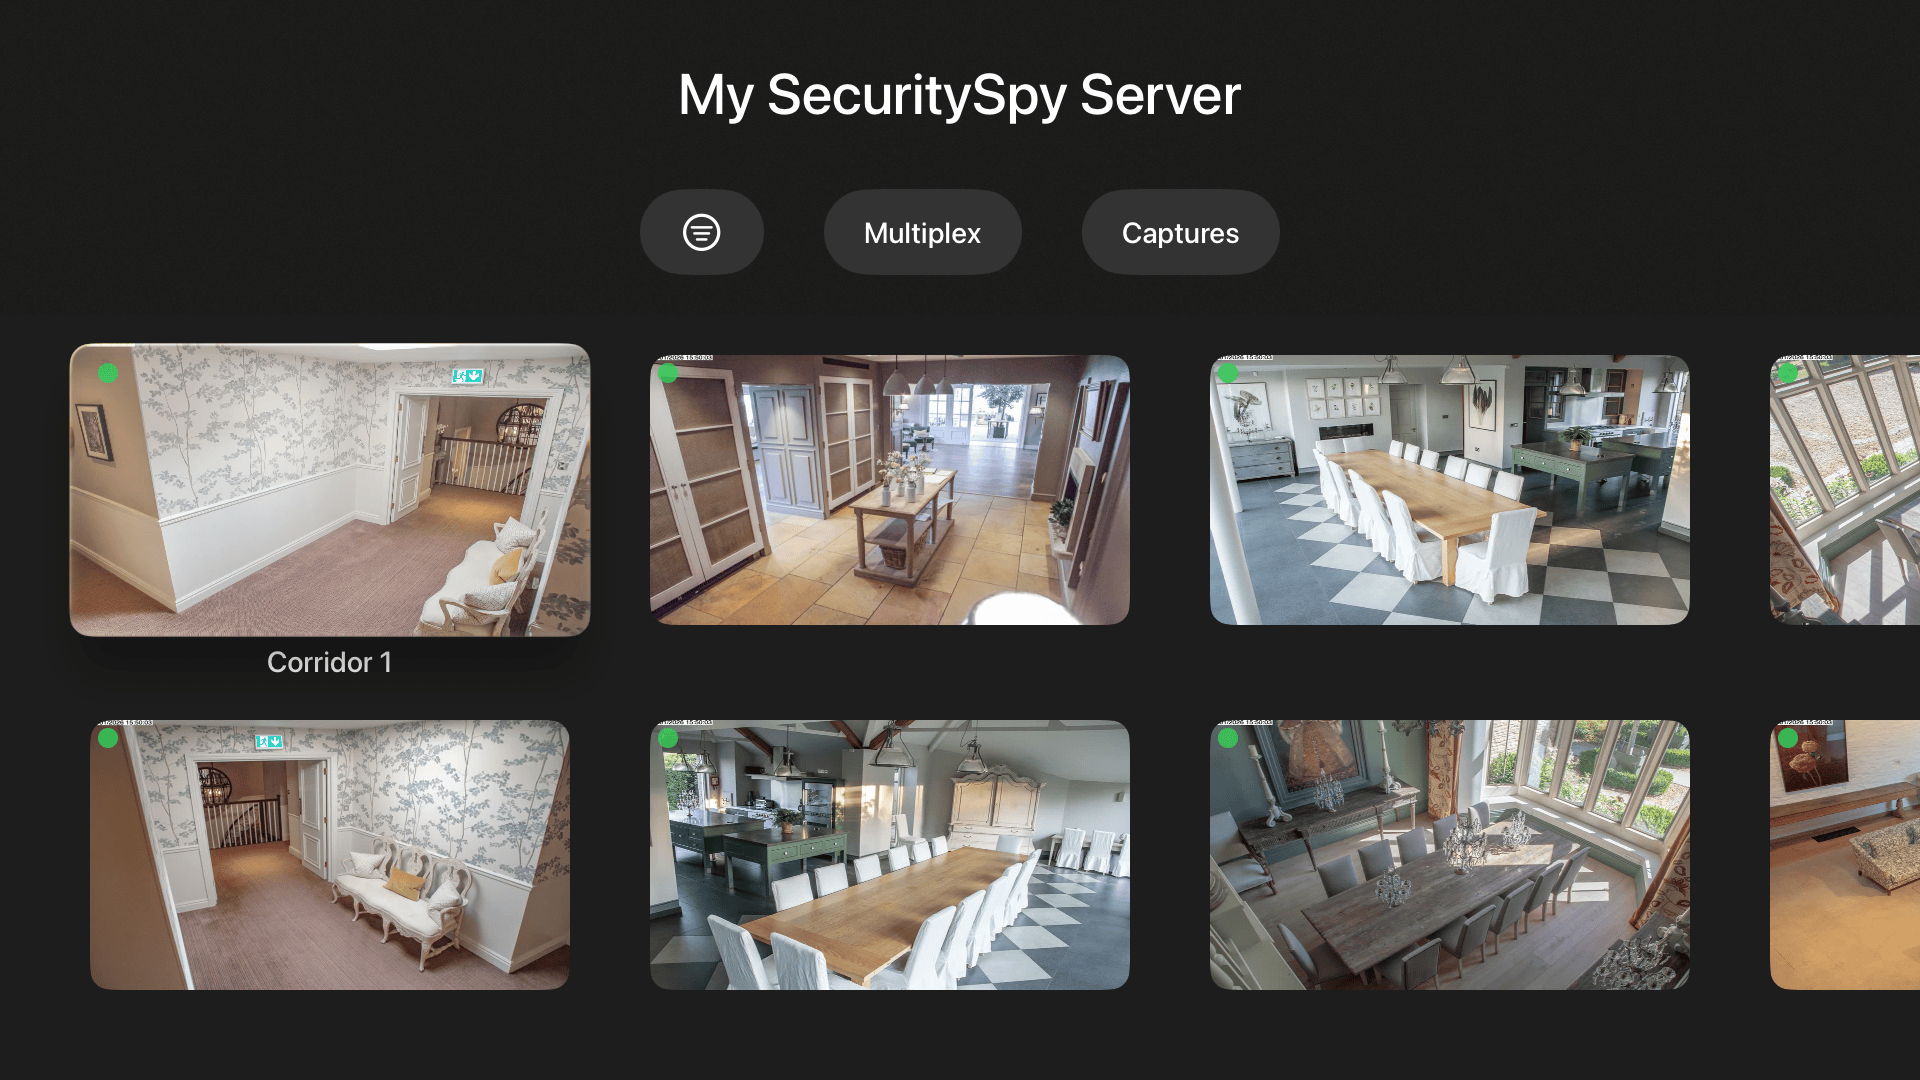
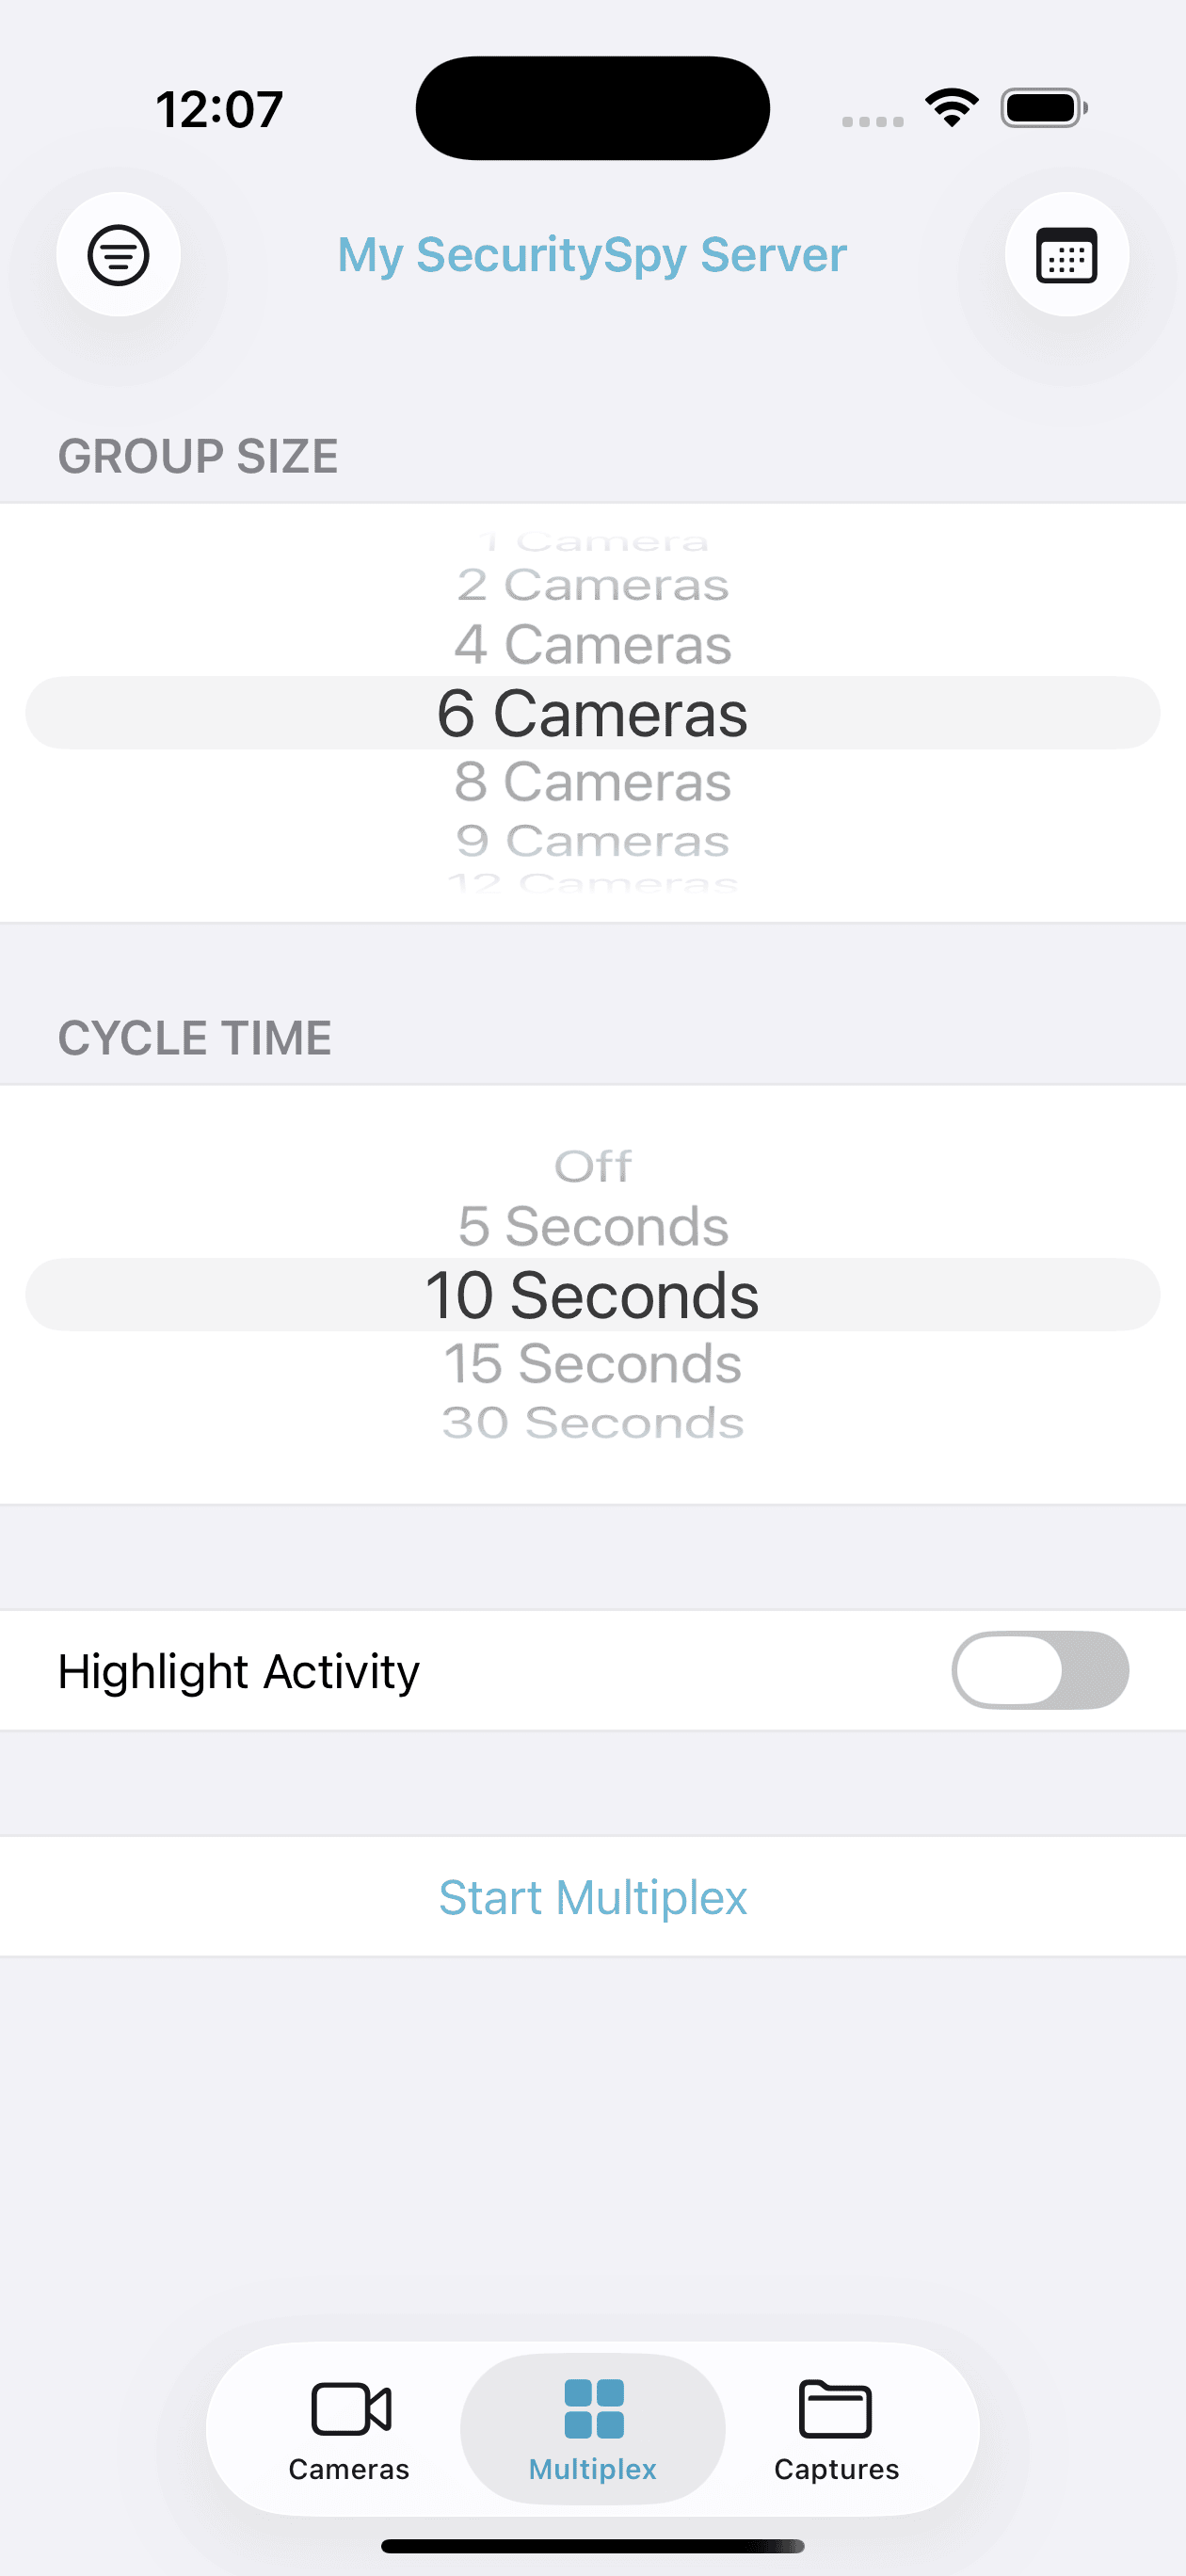
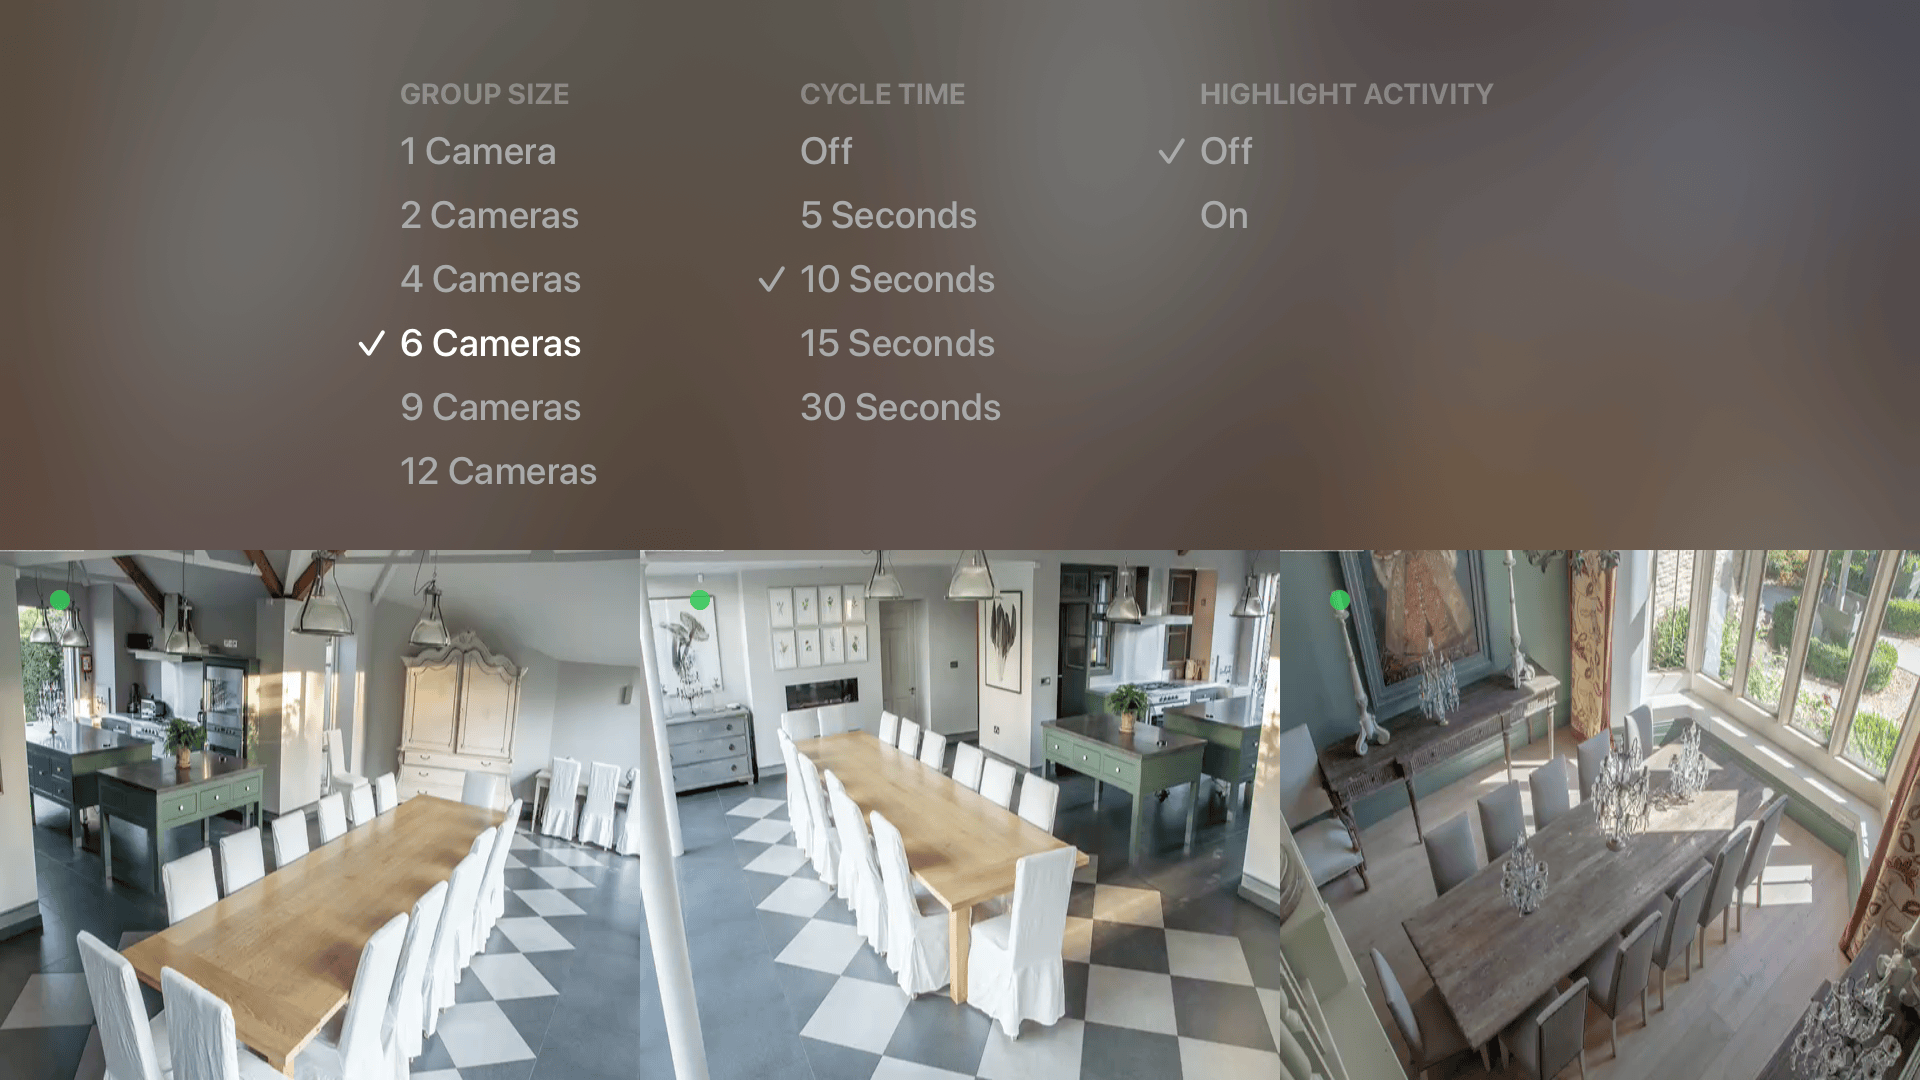
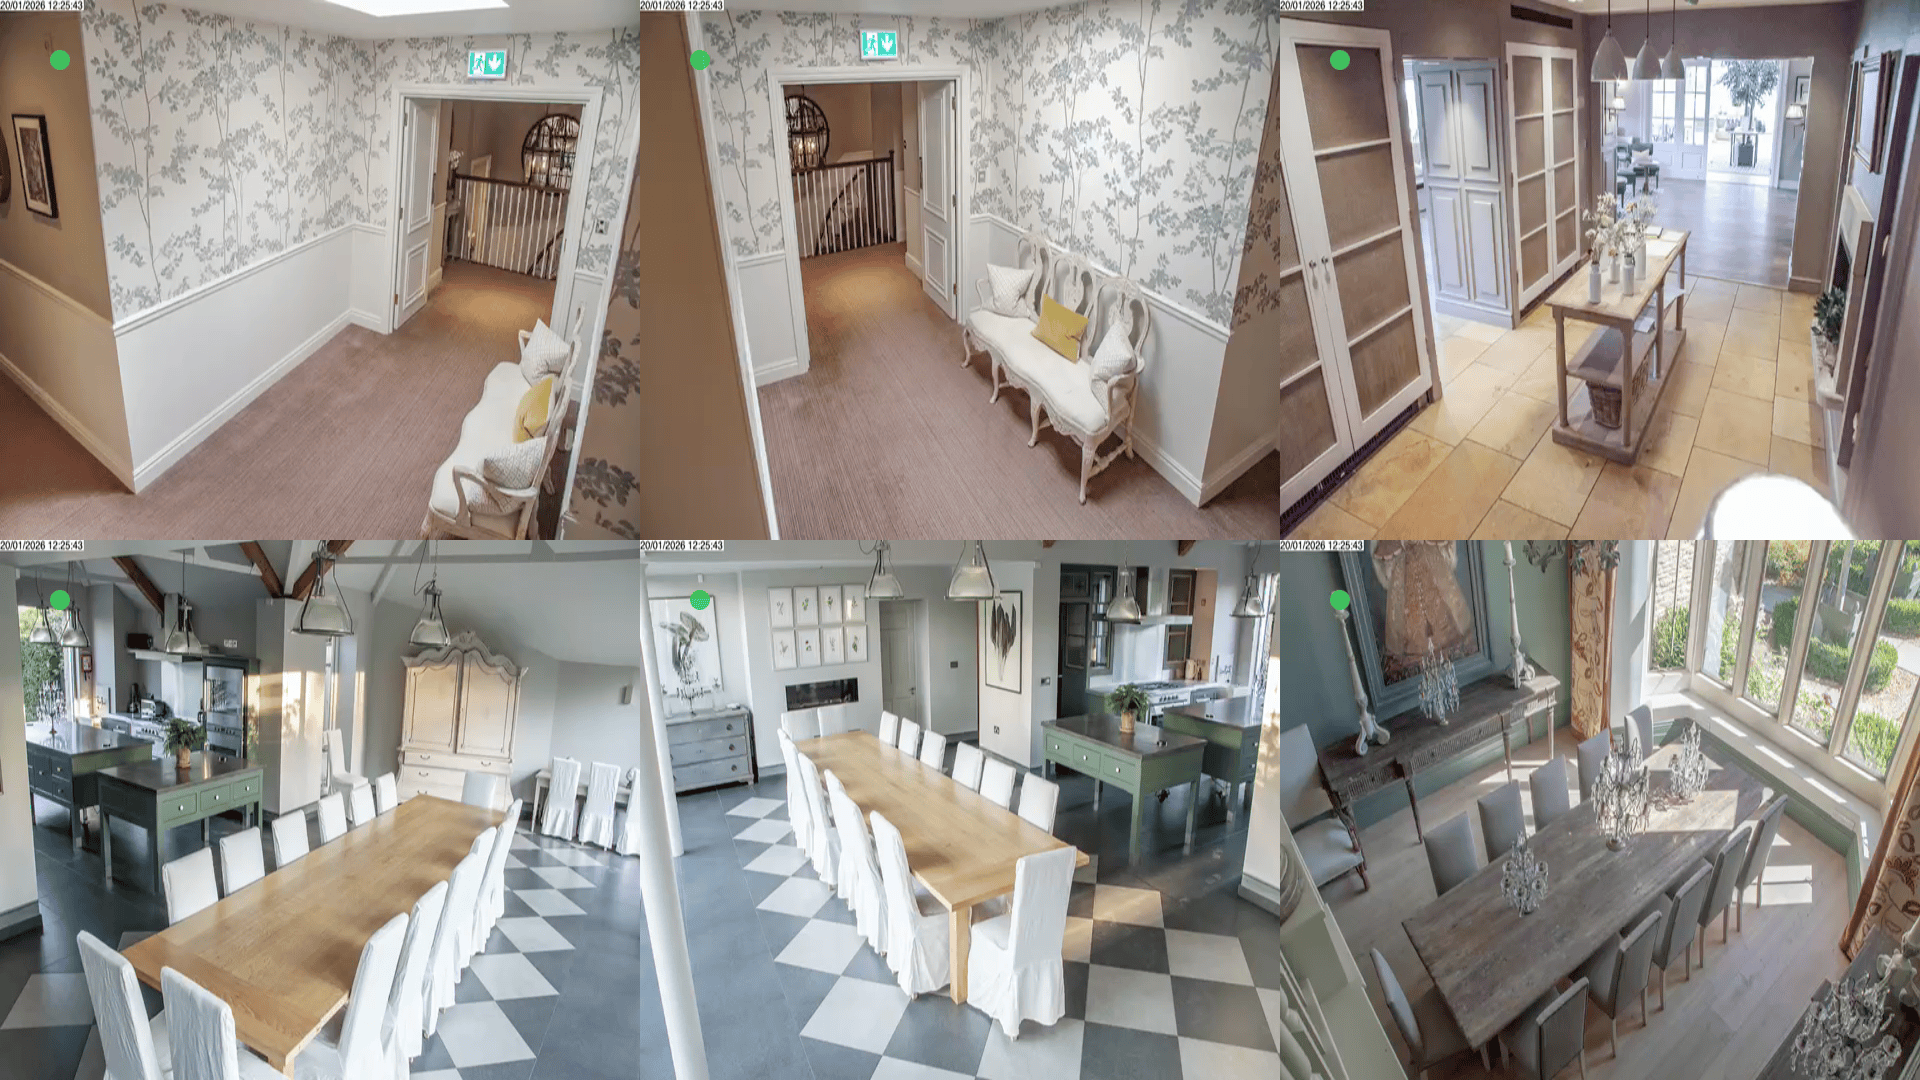
Multiplex
The Multiplex feature displays groups of cameras in sequence, in a full-screen display. On iOS, an initial setup screen offers options for group size and cycle time, while on tvOS this panel can be revealed with a down-swipe on the remote.
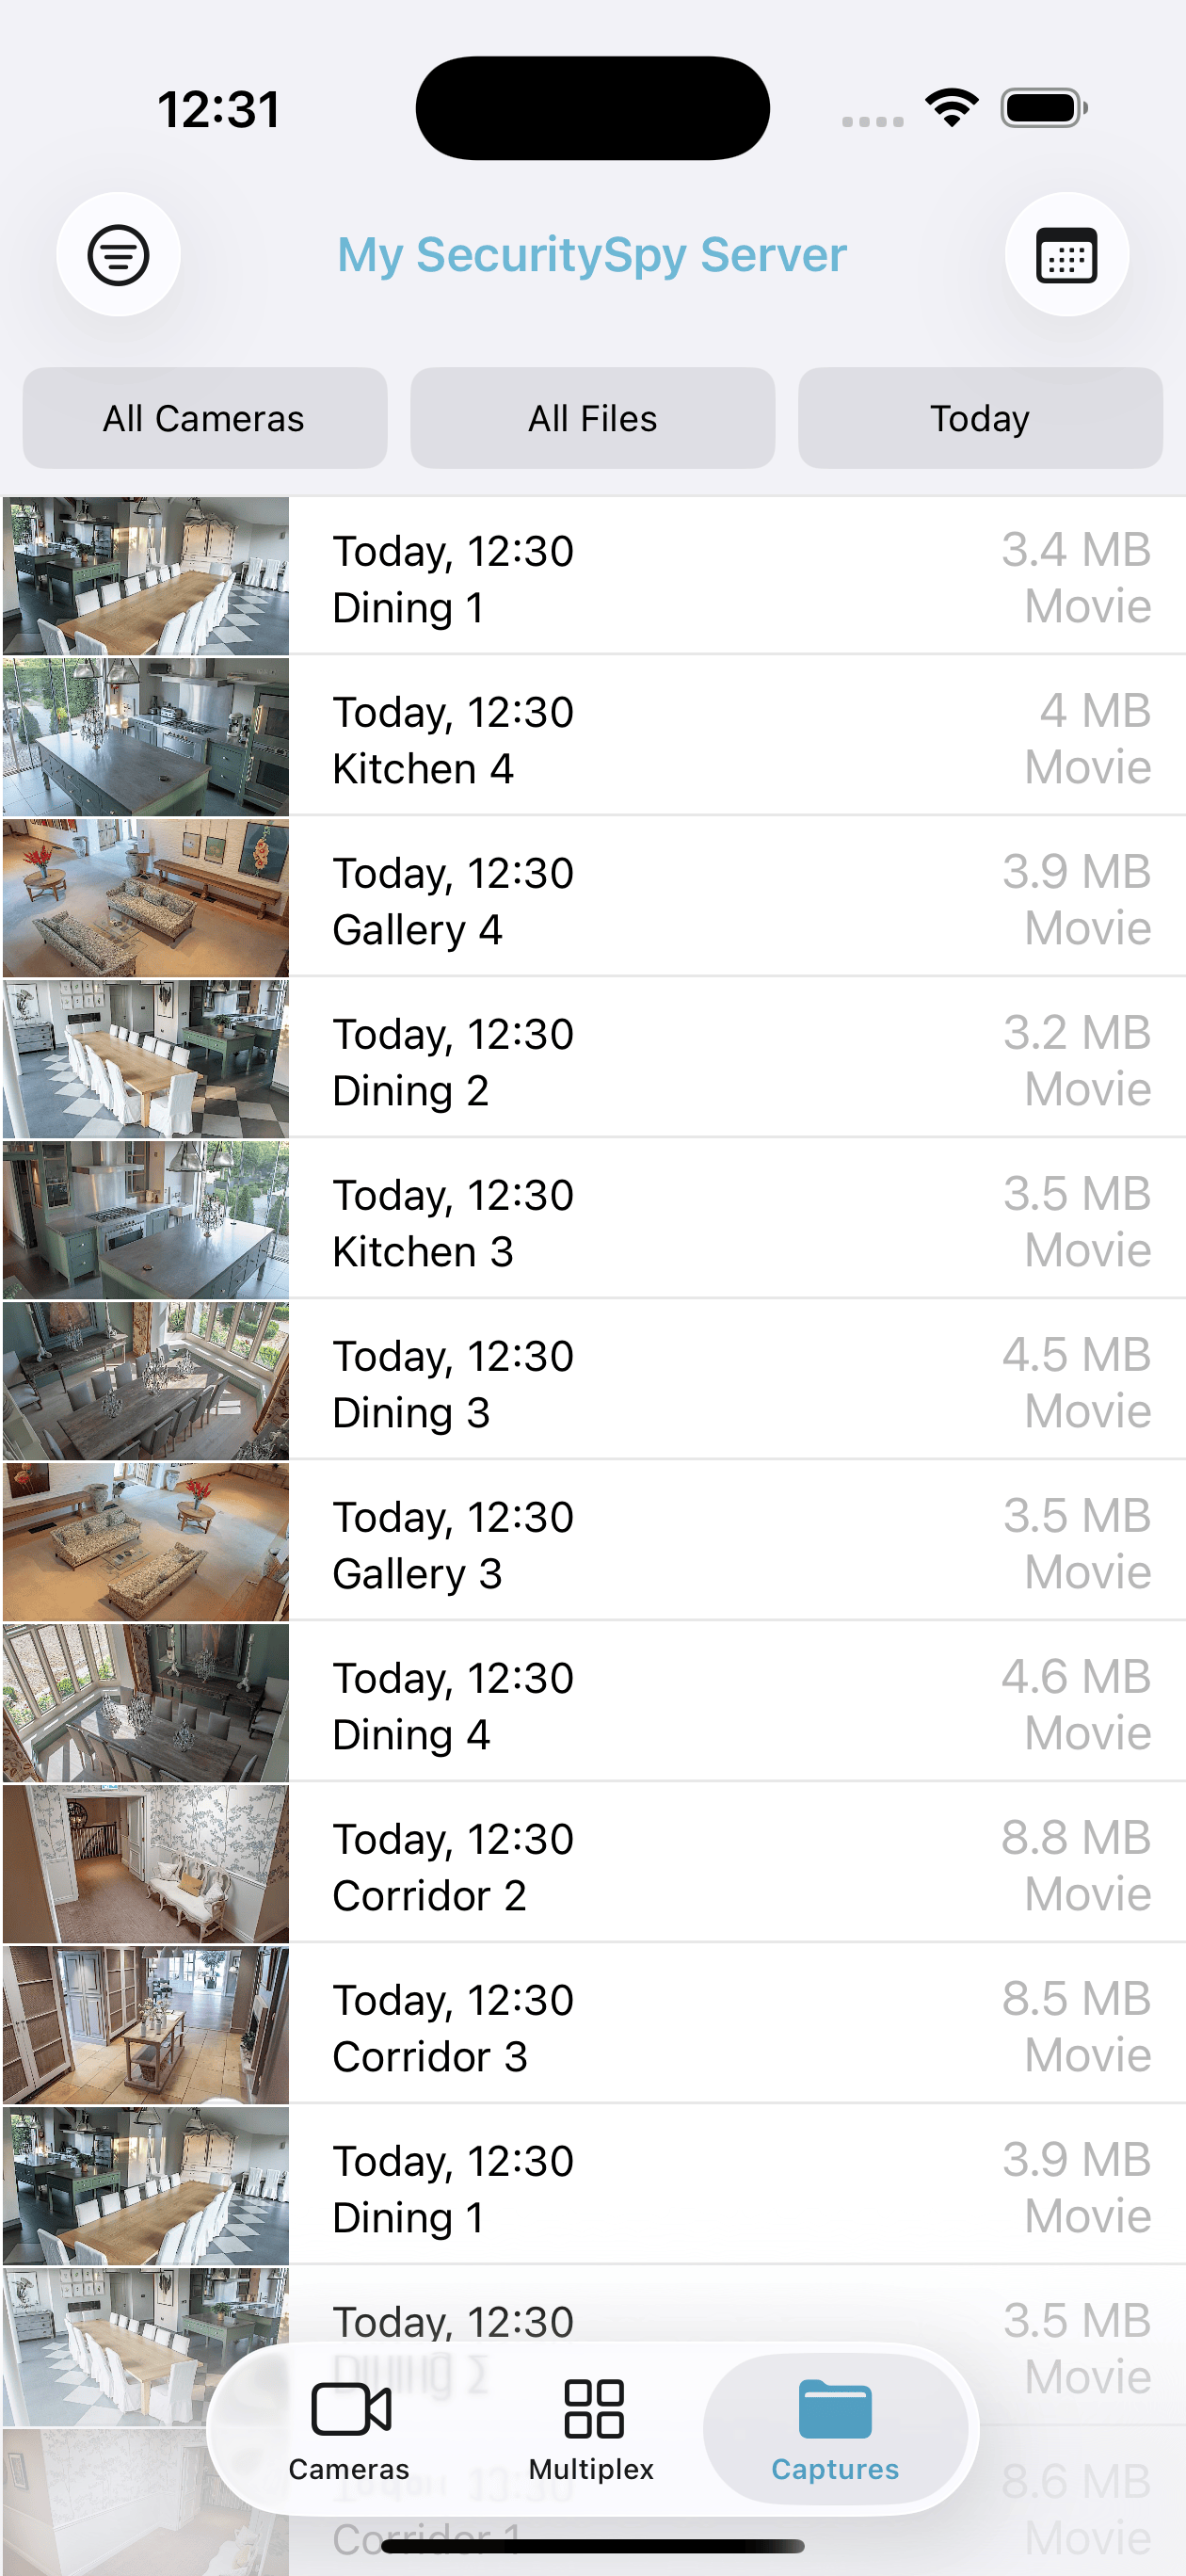
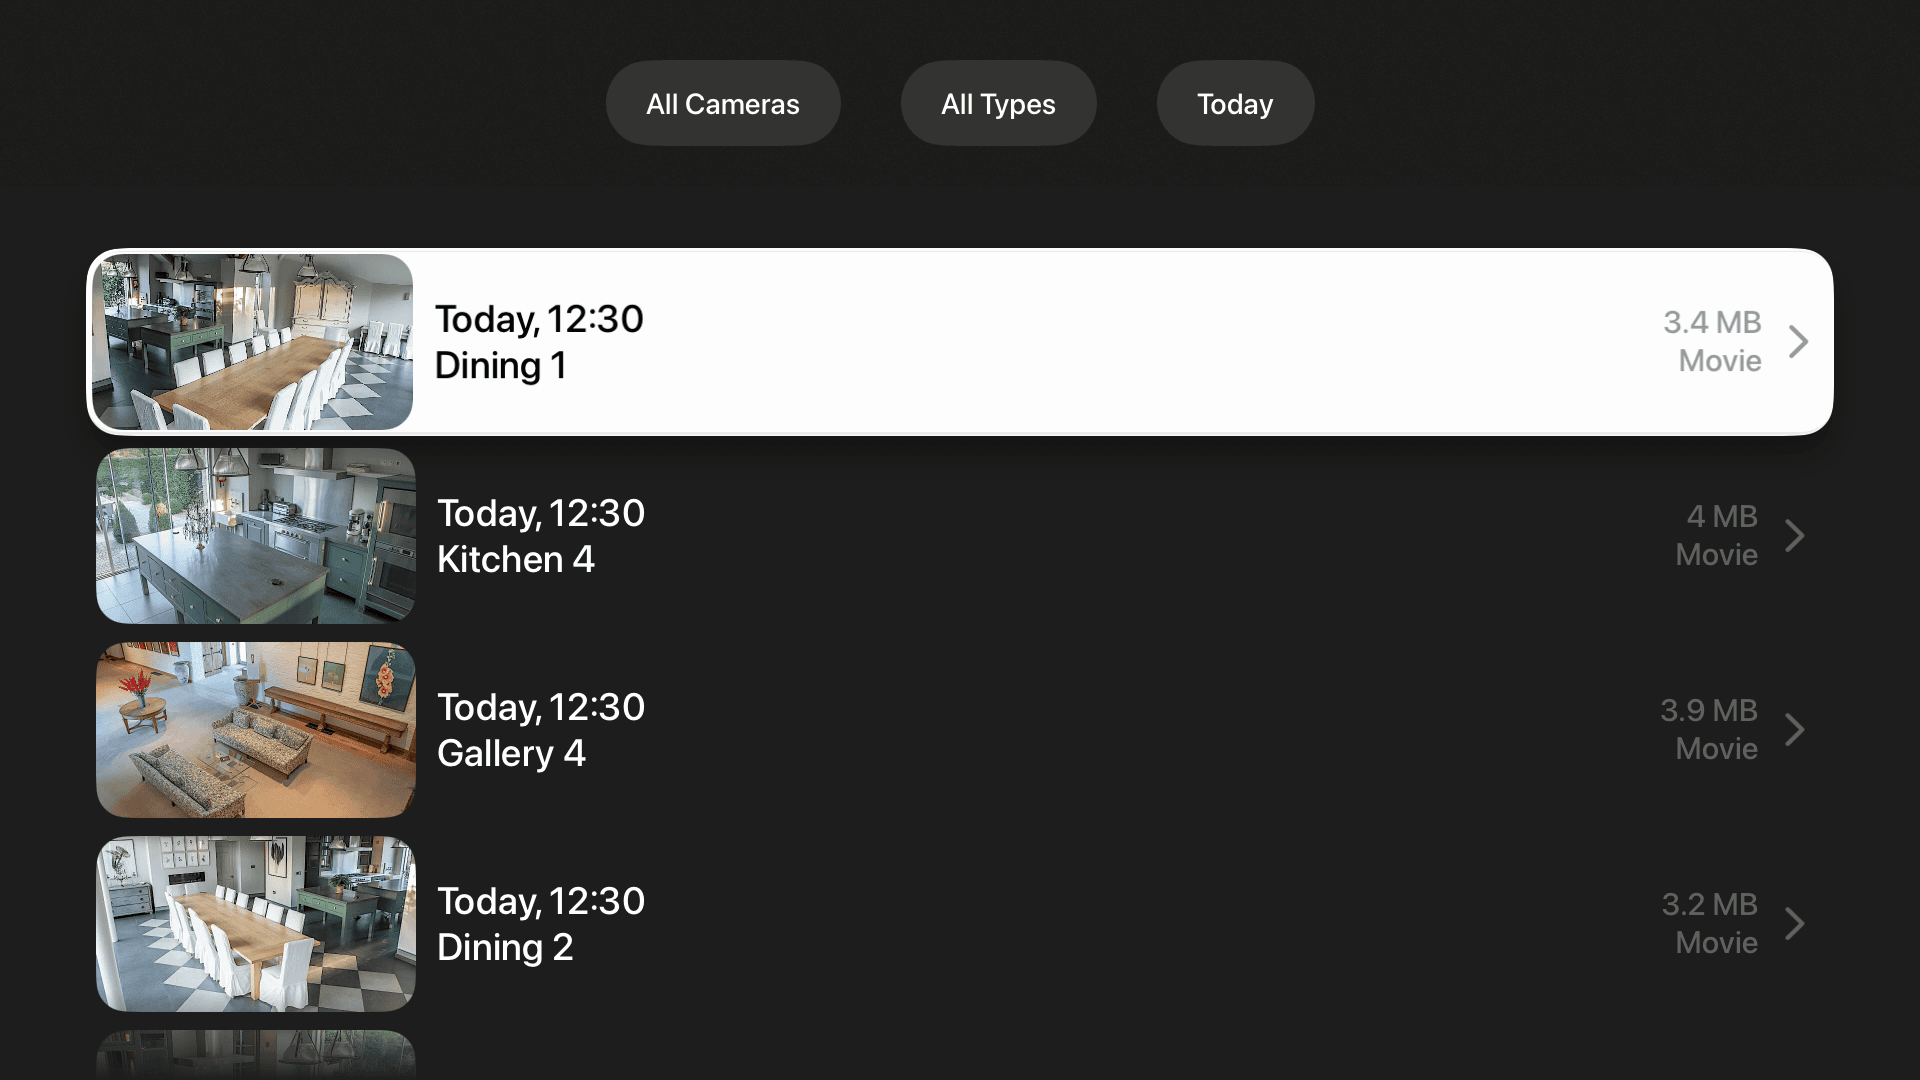
Captures
This section shows all captured files for your cameras. Files are ordered newest-to-oldest, starting with the date selected in the filter button at the top of the screen. On iOS and tvOS, if you keep scrolling down, the list will continue to grow to show older files. The other filter buttons allow you to view captures for a specific camera, or specific file types (e.g. Motion-Capture, Continuous-Capture, Humans, Vehicles, Animals etc.)
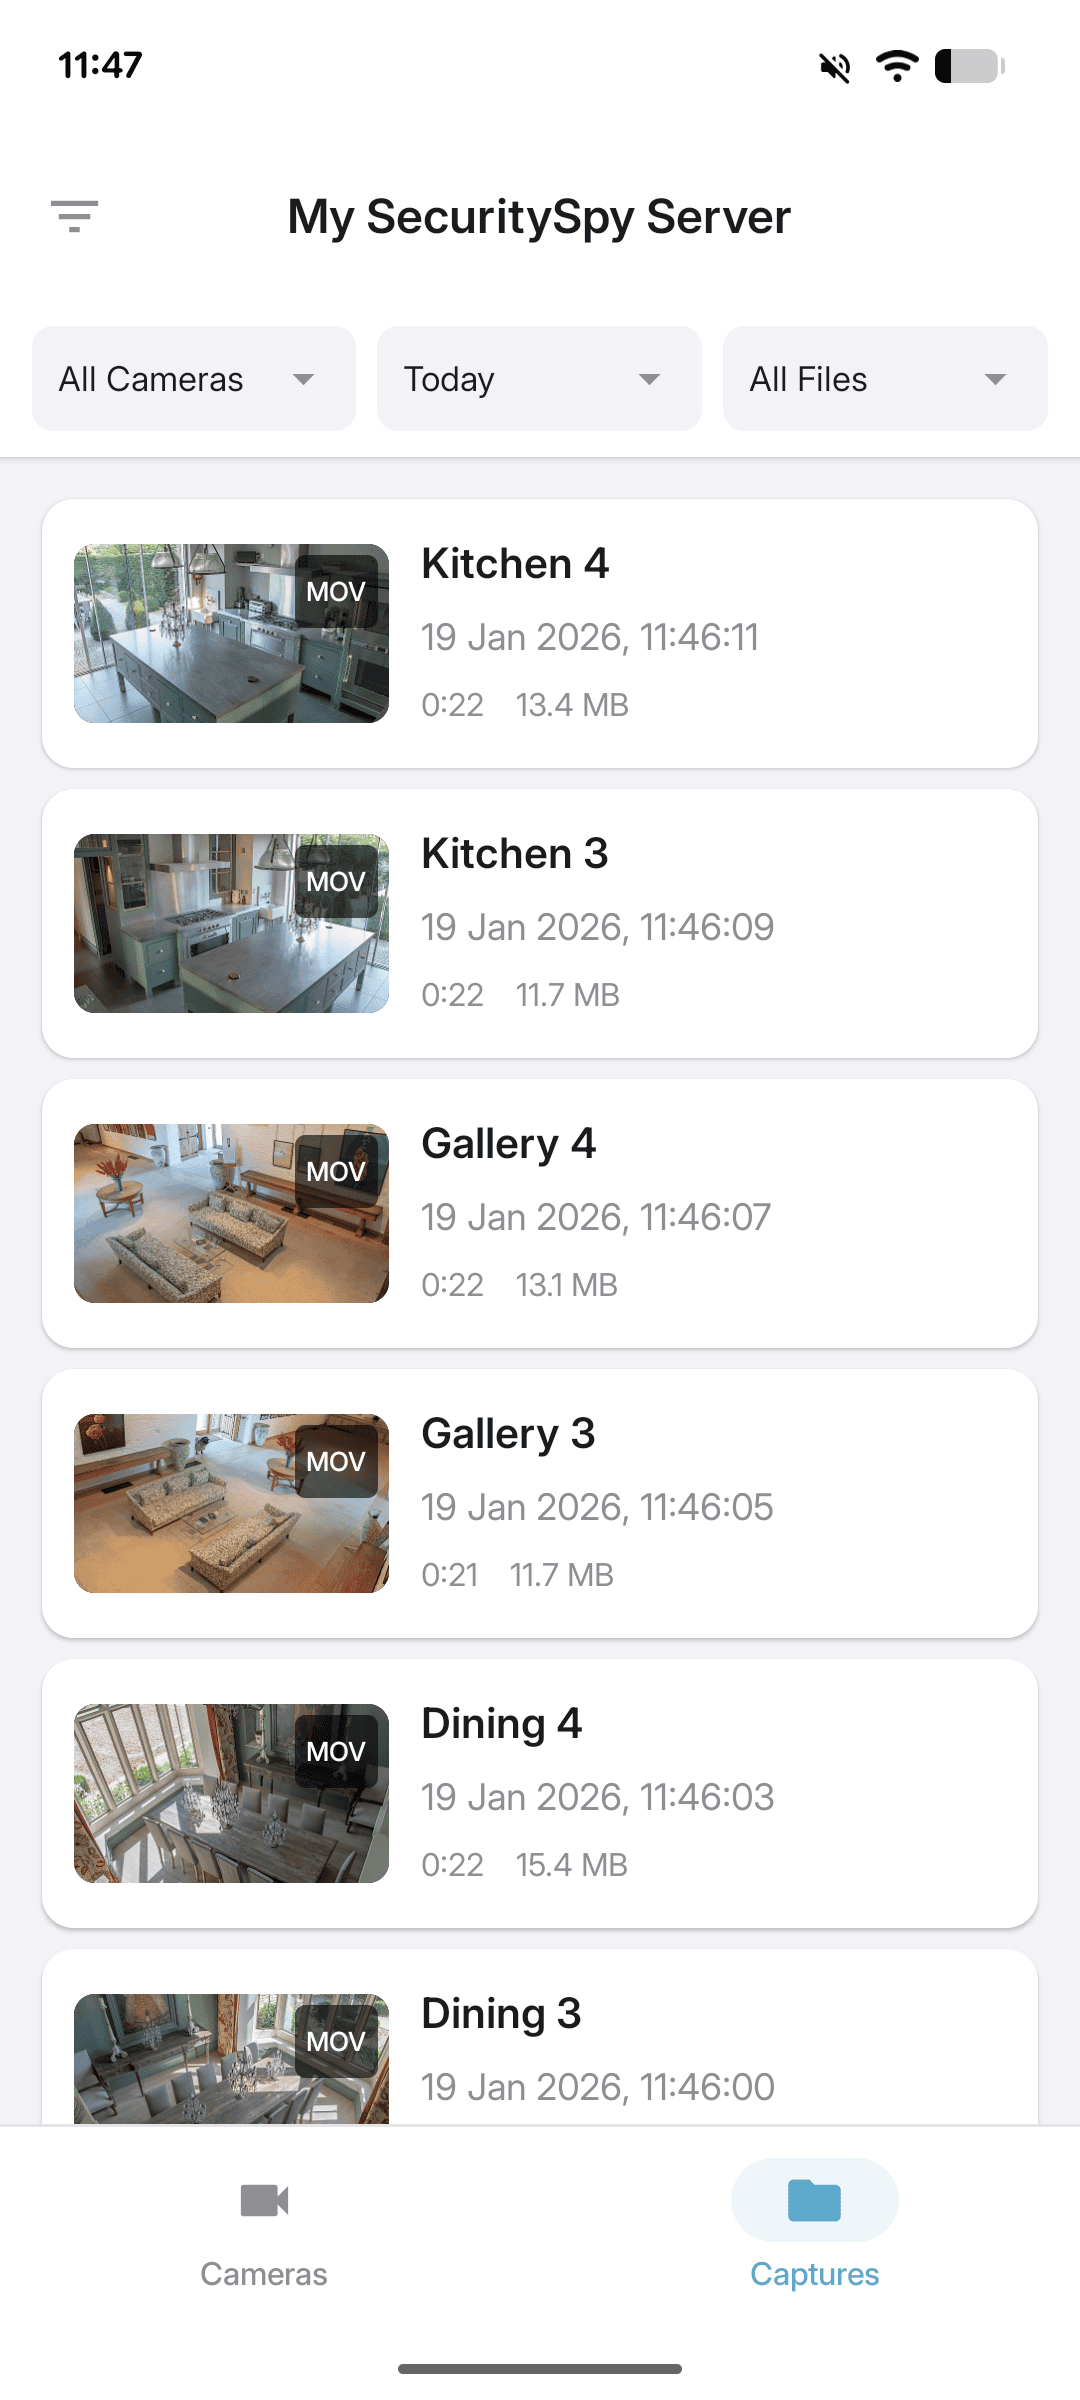
In iOS, you can long-tap on a file in the list to share it, or use the share button on the movie playback screen. Small files will be shared directly, otherwise a link will be automatically created for web-based access to the file. A variety of share options are available including AirDrop, iMessage, Mail and Files.
Settings
You can access app settings from the in-app button, or from Apple's Settings app. Available settings are as follows:
Time Zone
The time zone in which to display times of captured files - select between the zone of the server or the zone of the device.
Prevent Sleep (iOS Only)
Choose if/when to prevent device sleep - this is most useful for wall-mounted and powered iPad devices, where you want to keep them awake at all times when displaying live video.
Online Status Indicators
This controls the display of the live indicators at the top-left corner of each live video image, which provide feedback about connection status.
Display Mode
This controls how images will be fit into their display areas in the app, in the case of a mismatch of aspect ratio. Choose between stretching or cropping the image, or an intermediate "Balanced" option, which is usually the best method.
Streaming Format
Choose between H.264 / HEVC (low bandwidth, ideal for Internet transport) or JPEG (high bandwidth, but quick to produce and works well over local networks). There is also an Automatic option that lets the app decide the best streaming format to use for the circumstance.
Preview Size (iOS Only)
Choose how large you want the live video previews in the live grid view; this controls how many columns will be used for the display and how many cameras will be seen on screen at the same time.
Aspect Ratio (iOS Only)
This specifies the aspect ratio used for the live camera preview images. For optimum display, choose the option that best matches the video feeds produced by your cameras.
High-Quality Movies
When viewing over a local network, or over the Internet with a fast connection, high quality movie playback should work well. However, over slower connections, you may want to switch to low-quality movies, which are limited in resolution, frame rate, and duration in order to reduce their bandwidth.
Skip Size (iOS Only)
The movie playback controls include "skip back" and "skip forward" buttons - this setting determines how many seconds to skip.
Connecting Over a VPN
When connecting over a VPN (Virtual Private Network), automatic device discovery may not work (SecuritySpy uses Bonjour for automatic device discovery, which not all VPN solutions support). If this is the case, to connect over VPN:
- Make sure the Mac running SecuritySpy has a static IP address on its local network.
- Add the server manually to the app, using its local static IP address (if already added, delete and re-add it).
Getting Help
If you have any questions or problems using our apps, please email us and we will provide support.
Appendix: URL Scheme
This section describes the URL scheme that can be used by other apps to invoke the SecuritySpy iOS/tvOS app on the same device.
To open the SecuritySpy app and display the list of live cameras:
securityspy://[host]:[port]/live
To open the SecuritySpy app and display live video for a particular camera:
securityspy://[host]:[port]/live?cameraNum=[n]
To open the SecuritySpy app and start multiplex view:
securityspy://[host]:[port]/multiplex
To open the SecuritySpy app and display the list of captured files for a particular camera:
securityspy://[host]:[port]/download?cameraNum=[n]
For the most recently-used server (or if there is only one server set up), you can omit the [host]:[port] element, so for example the link to the list of live cameras becomes simply securityspy:///live
Camera numbers can be obtained from the Camera Info window on your SecuritySpy server (if you don't see them, tap the header bar and a menu pops up that allows you to add this column). Or, for an easy way to generate these links, open the live view for a particular camera in the SecuritySpy iOS app, tap the share button (the box with the arrow), and tap the Copy Link button.